Wednesday, December 21, 2011

Planning the New Year

Back again to show another project sure to help with organization. The best part about this project is that it's super easy and it will serve for an entire year!

pearllui-sei-dec-2012calendargift-600

Materials Used: SEI Spooks collection, Bazzill cardstock, Janome Sew Mini Sewing Machine

I created a fun and simple calendar that also serves as wall art and a picture frame. To create this calendar, I printed out the 2012 calendar, punched hearts of different sizes, cut a business card holder pocket and sewed them all to the page. I then finished it off with the 2012 stickers and slipped in a picture of my friend and I to personalize it. It's a simple enough of a project where you can even mass produce these to give to friends as a lovely handmade gift that helps them stay organized all year round too!

Hope you like this idea and be sure to check out the SEI blog for more inspiration!

Thanks for stopping by!
- KRAFTY pearl

Saturday, December 17, 2011

Welcome to the Hambly Design Team Blog Hop!

 Hi there and welcome to the Hambly Design Team Blog Hop!


We'd like to introduce you to the new design team members through a blog hop (and giveaway). Visit all 16 designer's blogs, where you can read a little bit about each member and see a project and/or tip about Hambly products. Leave a comment on each of their blog hop posts, then go to the Hambly Blog and leave comment. On Dec. 19th 2011 at 12 noon PST we will randomly pick and announce the winners on the Hambly Blog.

10 Random Facts About Me:
  1. I was born and raised in NYC, and I can't imagine living anywhere else.
  2. I have a bad habit of collecting handbags, shoes, and everything in between.
  3. I am a bit of a reality junkie and I have an appreciation for bad acting.
  4. I have a weakness for strawberry ice cream.
  5. Like many, I love to travel and experience different cultures.
  6. I love to make and design all kinds of things including jewelry, ceramics, and letterpress.
  7. I started scrapbooking seriously in 2003 investing in lots of paper, stamps and inks, etc.
  8. My scrapbooking style is a bit contemporary, a bit whimsical, and a bit crafty.
  9. I really enjoy scrapbooking the simple everyday moments that inspire me, not just the big events.
  10. I love scrapbooking because I get to recreate a moment in time, preserve it, remember it, and share it.

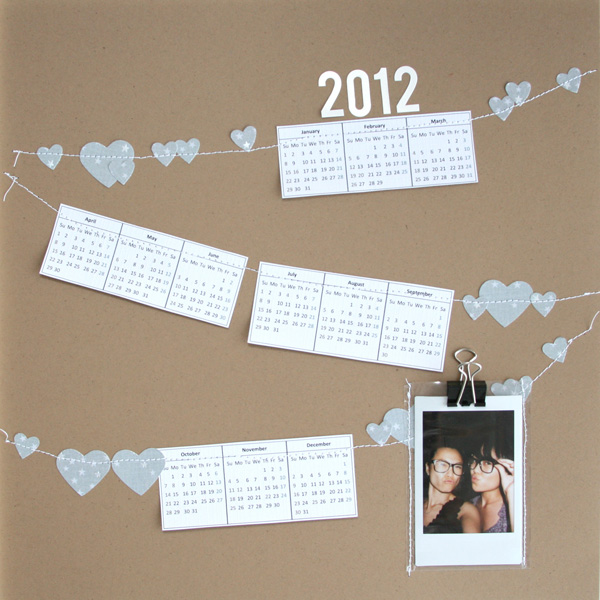
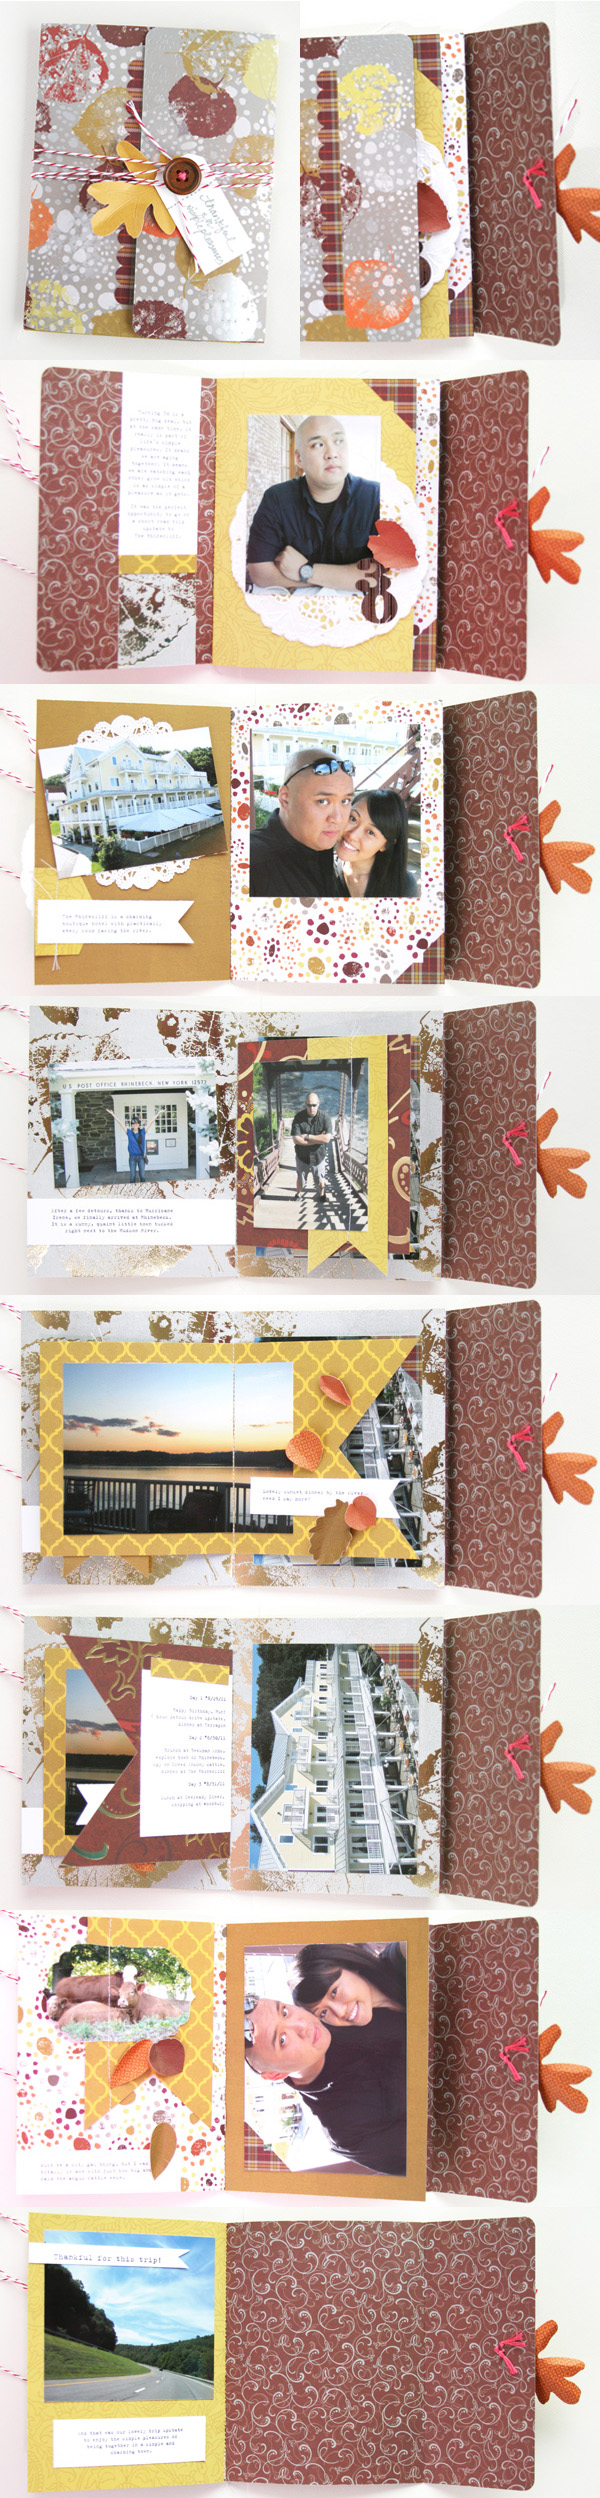
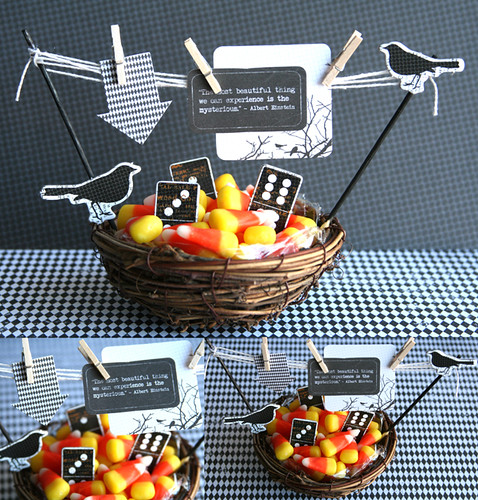
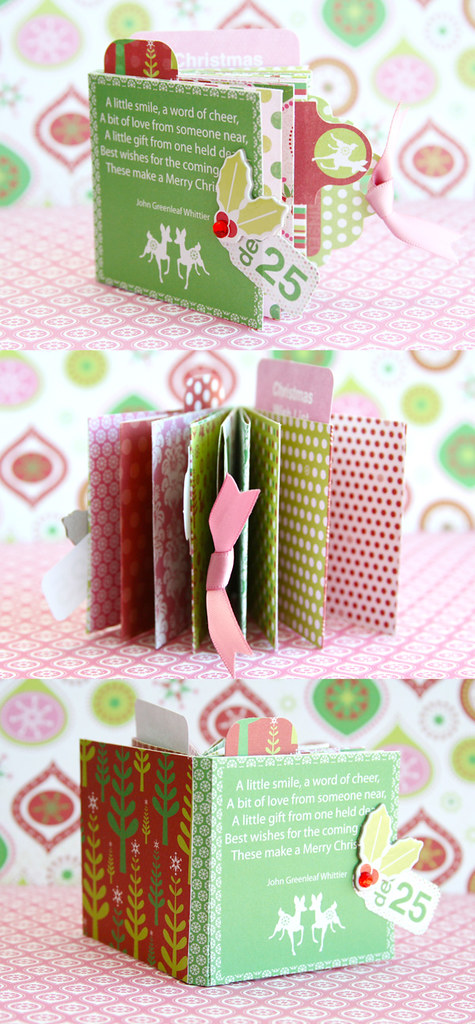
For this blog hop, I thought I'd share my December Daily foundation using Hambly overlays and pattern papers. I am slipping in daily Fuji Instax pictures, creating "photo booth" style photos, as well as snippets of lists and journaling in this album to show the progression of December. So I'll definitely be back in January to share my final album, photos, journaling, further embellishing and more!


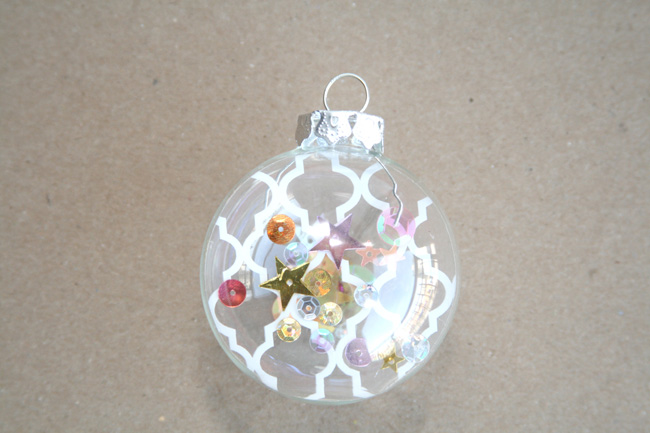
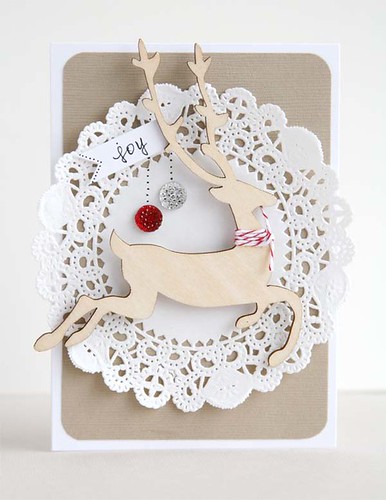
Materials Used: Hambly Overlays: Lattice, Woodgrain, Mini Brocade; Hambly Pattern Papers: Brocade Blossom, Lattice; Hambly Rub-ons: Holiday Reindeer, Banners & Pennants; 
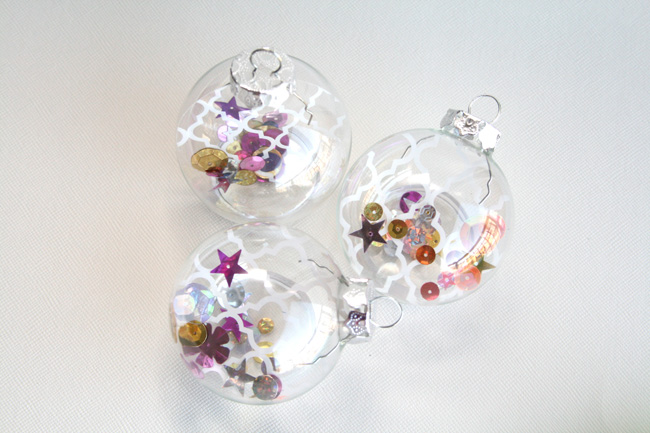
Stick-It Glimmer Stars, Janome Sew Mini Sewing Machine, sequins, white tissue paper, mini sheet protectors, various doilies

Here's a closer look and some tips!

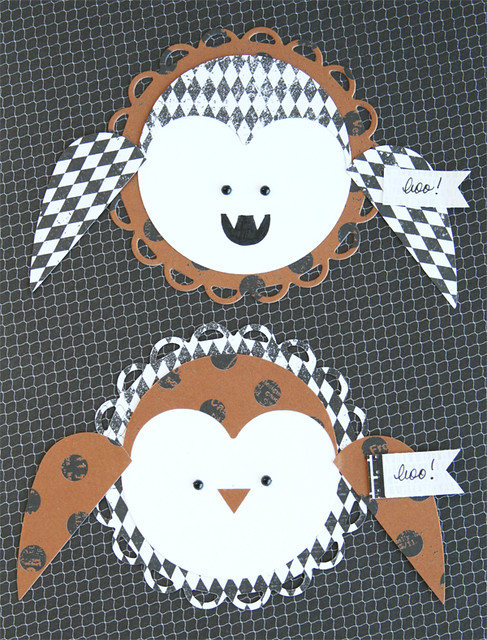
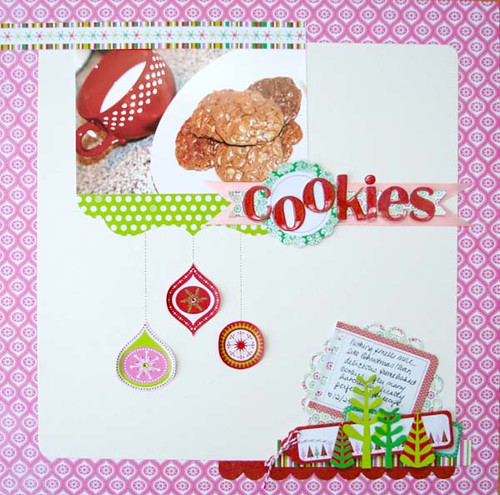
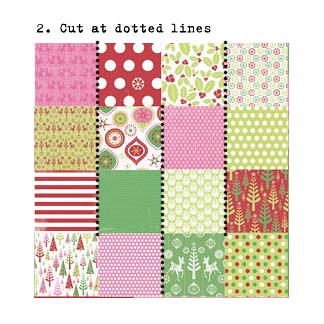
Tip: Pre-sew embellishments on pages to make the process of daily documenting easier!
One of the reasons I usually fall of the wagon with daily scrapbooking albums is because I simply don't have time to embellish a page a day. So as you can see above, I have pre-sewn some white tissue paper to paper so I can very easily just slip a photo behind the top ruffle, and the page is practically complete.

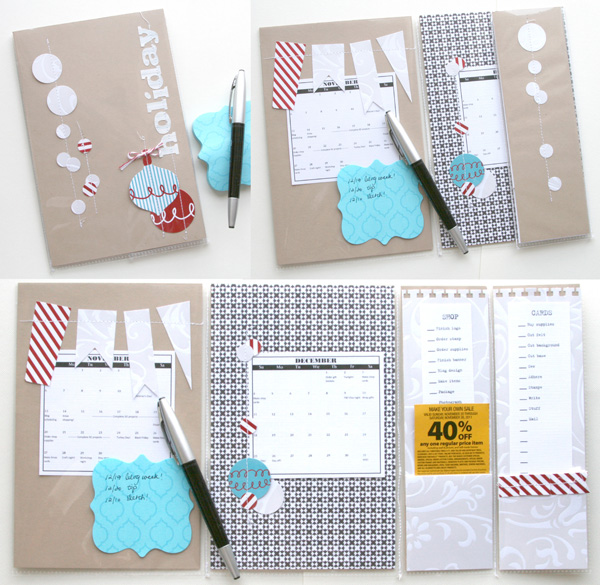
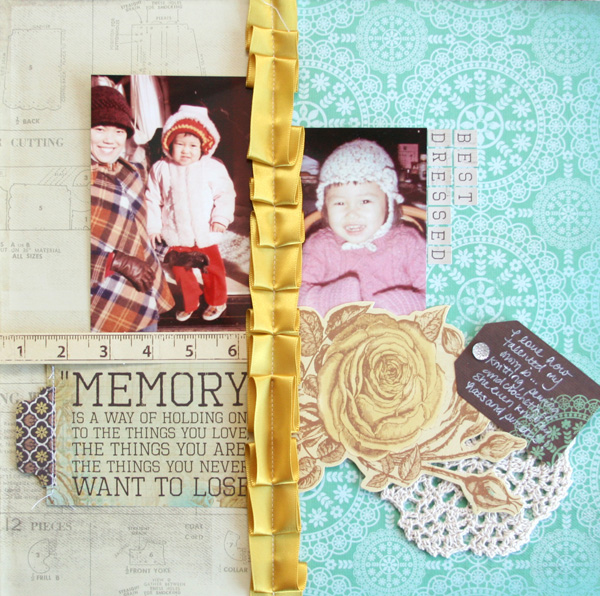
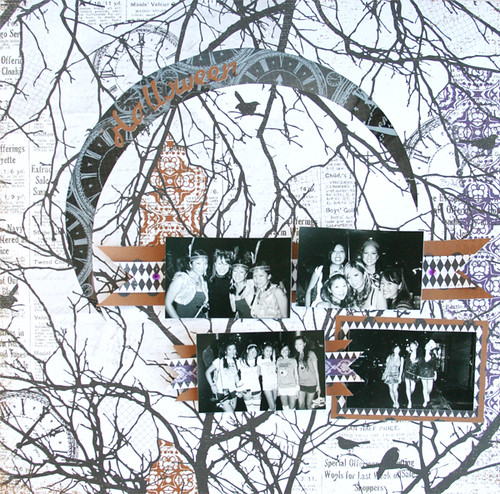
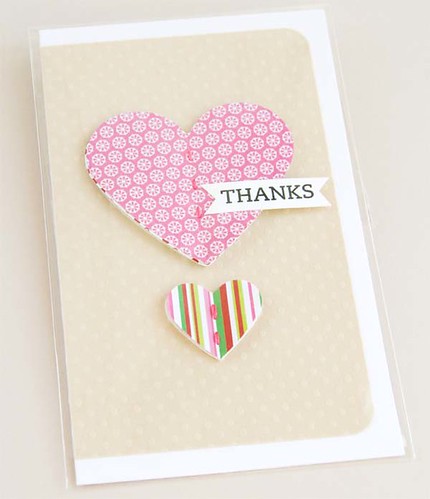
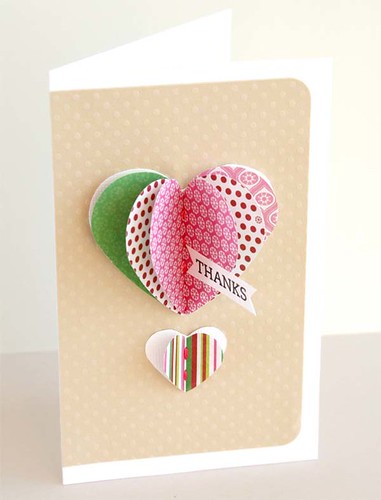
Tip: A simple rub-on put on a clear sheet protector instantly dresses up and display any collection of cards or gift tags.
I tend to collect cards and gift tags so I like to include them in my December Daily. Instead of punching holes in them and directly adding them in to the album as a page, I tend to like the look of them being preserved. So I like to use sheet protectors where I can just simply throw in cards and gift tags collected.

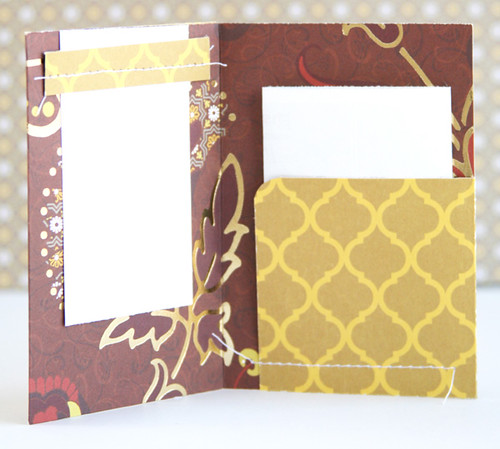
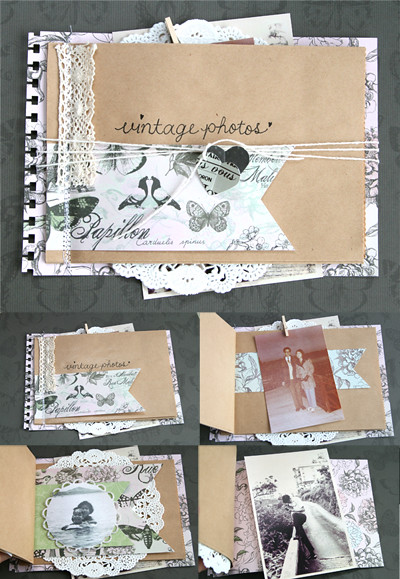
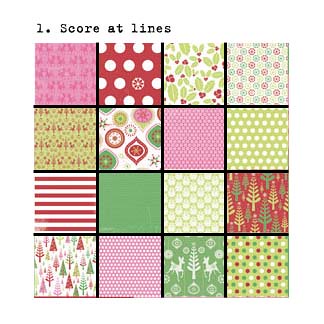
Tip: Sew a clear transparency to the back of a Hambly overlay to create more pocket space!
One can never use enough pockets especially in the December Daily for quick and easy storage. With the pattern overlays, the pockets are beautiful and ready to give any album a layered look. Love!

Hope you like my take on the December Daily and don't forget to visit the entire Hambly design team's blogs, leave a comment on each of their blog hop posts, then go back to the Hambly Blog and leave a comment. Details above! Hambly design team's blogs:


Thanks for stopping by!
- KRAFTY pearl

Tuesday, December 13, 2011

Staying Organized in December

I find it particularly hard to keep it all together in December, largely due to all the events, gift buying, and new year planning. Don't get me wrong, it's my favorite time of year. Lots of tying up loose ends as well as beginning new plans and resolutions. So the remainder of December's projects will be things crafted to help me stay organized through the end of the year. I'll let you know how I do with my newly crafted organization tools come January. :)

If you're like me, you have tons of post-it notes floating everywhere with all kinds of lists that are always at the wrong places when you need them. Welp, my solution this year is to keep a pocket organizer just for the last two months of the year when all the hustle and bustle occurs.

pearllui-sei-dec-holidayplanner-composite-600

Materials Used: SEI Holiday Cheer, White Elegance collections; Janome Sew Mini Sewing Machine, circle punches

Inside there's a November and December calendar, a lists of various to-do's, a place to collect coupons and slip in anything else such as receipts from gift purchases, etc.

To create the organizer, I sewed three 5 1/2 x 8 sheet protectors together. The third sheet protector was sewn in half. I then cut a slit in the middle of the pockets for coupon and receipt storage. (Yep, that's a Michael's coupon.)

So far this system has proven to work quite well for me. The best part about this is that once this year completes, I have all of my lists and plans all stored and documented in one place. And, next year, I'll be able to look at all of my lists from this year.

Hope you like this idea and be sure to check out the SEI blog for more inspiration!

Thanks for stopping by!
- KRAFTY pearl

Tuesday, December 6, 2011

December already?

I can't believe we're already 6 days into December! I've got a fun ornament tutorial to share today and it's coming just in time for tree decorating!

pearllui-hambly-dec-ornament-photo1

I really love the perception of depth and layers. That's one of the many reasons I'm so thrilled to be on the Hambly design team because I love all of the overlays and how they can easily transform any project and provide a clear yet layered look. I made some ornaments using that same design element that you can only get by using Hambly overlays.

You'll need:


pearllui-hambly-dec-ornament-photo2

Directions:
1. Cut circles from the overlay using a circle die and die-cut machine
2. Remove the top of the glass ornament, slip the circle overlay into the ornament by rolling it up. Use a pair of long thin needle nose pliers to straighten the overlay if necessary.

pearllui-hambly-dec-ornament-photo3

3. Sprinkle some sequins in and close the ornament top. Voila! Make a few more and you've got yourself all the ornaments you'll need for this holiday season!

pearllui-hambly-dec-ornament-photo4

Hope you enjoyed today's tutorial and my first project as an official Hambly design team member. Don't forget to check out the Hambly blog for more inspiration!

Thanks for stopping by!
- KRAFTY pearl

Tuesday, November 29, 2011

Thankful for Simple Pleasures

To round off November, I'm sharing a project I made using the awesome SEI Homestead collection. I made a mini book to document a lovely trip to upstate NY.

pearllui-sei-nov-homestead-mini-composite-600

Materials Used: SEI Homestead Collection pattern papers, stickers, die-cut leaves, Silver Valley button; Others: Whisker Graphics twine, embroidery floss, doilies, Big Shot die-cut machine, die, markers, Janome Sew Mini Sewing Machine


SEI pattern papers have this great thick quality to them making sturdy mini album pages and a cover. Some interesting things to note in the mini is how it is made up of just 4 pieces of paper scored and sewed together using a sewing machine. The design is just as interesting because the cover is actually a tri-fold so there is a flap that flips over the front cover and when the flap is opened, it reveals staggered pages. Lastly, a long piece of twine is wrapped around the album several times and securered to a button to keep the bulky pages of the book enclosed in a neat little package.

And remember to check out more inspiration on the SEI blog!

Thanks for stopping by!
- KRAFTY pearl

Thursday, November 24, 2011

Happy Thanksgiving!

I have a few things I wanted to share before tonight's feast, so even though, I didn't think I'd have time to get another post up, I had to make time to deliver you this menu:

THE TURKEY
Very simply put... I am thankful for the many people who have touched me this year.. including you! I am also thankful for many "things", milestones, events, and opportunities that have been woven into the fabric of my very being this year. Thank you, universe!

THE STUFFING
Among quite a few adventures and chances I've taken this year, all of which have been on my 2011 goals list, I am taking another one. I am taking on a part-time project to start my own Etsy shop to sell my handmade goodies and maybe even some coordinating supplies. Best of all about this shop is that 20% of annual sales will be donated to support the fight against cancer. This is a very serious cause to me for many reasons, so I look forward to launching it in the next two weeks and I ask that you stay tuned!

THE GRAVY
Thanksgiving in the States marks two very busy shopping days - Black Friday and Cyber Monday. This is also when the entire year's best discounts, prices, and sales can be found. I received a few emails and thought I'd pass the savings along to some of my favorite shops!

Two Peas in a Bucket is offering 20% off today through Monday.
Hambly is offering 35% off on Friday!

THE DESSERT
As always, I thank you for stopping by! Whether you're celebrating Thanksgiving or not, give the people you love a hug today!

{Hugs}
- KRAFTY pearl

Tuesday, November 22, 2011

Thankful for Being "Best Dressed"...

Well, not really for being "best dressed" but rather, I'm thankful for my parents! I was going through a ton of old photos last month and I came across these showing some of the items my mom had sewn and knitted for me when I was a kid. Of course, the vintage feel of the lovely Kaisercraft Madam Boutique collection was perfect for these old school photos.

pearllui-kaisercraft-madame-layout-bestdressed-600

Materials Used: Kaisercraft Madam Boutique Blouse pattern paper, Madam Boutique Collectables, Alphas 12 x 12 Sticker Sheet, crochet doily; Other: Janome Sew Mini Sewing Machine, satin ribbon, white pen

I'm so glad my dad took these photos, because this gives me a glimpse into their lives before I could remember. So as you celebrate Thanksgiving this week, don't forget to have your camera with you to capture all your merry moments, and most importantly, live in those moments and be present! If I don't get to come back on the blog before Thanksgiving Day, have a very happy turkey day!

Thanks for stopping by!
- KRAFTY pearl

Thursday, November 17, 2011

Thankful for the City Sky

Often times we forget to just stop and "smell the roses." Or in my case, stop to soak in the beautiful city sky at sunset. With this gorgeous view, who needs the white picket fence! I am thankful for moments like this...

pearllui-kaisercraft-merrymedley-layout-citysky-600

Materials Used: Kaisercraft Merry Medley Harmony and Melody pattern paper, Timeless Black & White paper pad, Cock-a-doodle-doo! Farm 12x12 sticker sheet, Alphas 12x12 sticker sheet; Other: Corner punch, BIC Mark-It markers, Janome Sew Mini Sewing Machine

The Kaisercraft Merry Medley collection has an abundance of possibilities for all year round because of its fun and season-less designs. It has great colors for Christmas, but it also has great subtle and neutral colors as I used here in my layout. One of my favorite parts of the layout is where I mimicked the picture's city skyline by cutting out skylines using three different pattern papers.

Hope you like what you see and be sure to check out the Kaisercraft blog for more inspiration!

Thanks for stopping by!
- KRAFTY pearl

Wednesday, November 16, 2011

Thankful for My Fave Munchkins

I can't believe it's mid-November already! I thought it'd be fun if I started a "thankful" series for the remainder of the month. I'm still super happy and thankful to have made the Hambly team! But today, I'm hear to share some layouts I made with this month's new Kaisercraft releases.

I'm thankful to be a proud godmom to these super sweet and yummy little munchkins. They always manage to make me smile, and how can I not? Just look at these cuties!


Materials Used: Kaisercraft Cock-a-doodle-doo! Meow! and Woof! pattern papers, Neigh! 12 x 12 gloss specialty, foam tape; Other: Janome Sew Mini Sewing Machine

The Kaisercraft Cock-a-doodle-doo! collection is perfect for fun layouts of farms, parks, gardens, etc. But here I used the fun papers to create a layout about my lovely godchildren. I cut strips of paper and banner and adhered them to the layout using a messy double zig zag stitch around the page. I also cut animal shapes from the Neigh! pattern paper. So simple and fun!

Don't forget to check out the Kaisercraft blog for more inspiration!

Thanks for stopping by!
- KRAFTY pearl

Tuesday, November 15, 2011

Amazing News!

Good morning!

I woke up this morning to absolutely amazing news and I must share! After applying for this, I actually made the Hambly design team! Yay! In all honesty, I didn't think I had a chance, but I was making a few things with tons of Hambly product anyway, so I thought, "why not give it a go?" This goes to show that everything is worth a try, because you just never know!

Just here to share the great news, thank Allison of Hambly, invite you to check out the rest of the amazingly talented design team, and share some of my favorite Hambly designs:


Will be back to share projects tomorrow!

Thanks for stopping by!
- KRAFTY pearl

Friday, November 11, 2011

"Leaf" It Up to SEI...

TGIF! I was out of the country for a friend's wedding for a few days last week, so it's been a bit quiet here. But I've got lots to share in the coming weeks, so stay tuned!

I love SEI... why? "Leaf" (har har) it up to SEI to manufacture sturdy and crisp pattern papers, cardstocks, and die-cuts, they're awesome! Here are two simple anytime cards made primarily with the SEI Homestead Collection.

First, I made a simple card using the fall foliage die-cut leaves. I absolutely love the clean yet crinkly shapes of the leaves, so to play off of them, I created a homespun design using strips of scrap paper to create a banner. To echo the banner shape and organic feel of the card, I also created a simple banner with the handwritten sentiment of "thankful for you". This is a super easy, fun, and great way to use up scraps!


Materials Used:
SEI Homestead Collection pattern papers, die-cut leaves, Silver Valley button; Other: doilies, Janome Sew Mini Sewing Machine, Mark-It Permanent Markers

Then, I made a red envelope as a gift to one of my friend's newborn's 100th day celebration. In the Chinese culture, whenever there is a new born celebration, a red envelop is always in order. They're most popular during the Chinese New Year celebration when married adults hand them out to children of family and friends.

pearllui-sei-nov-homestead-redenvelope-600

Here I used a single strip of 4"x 11.5" pattern paper. The Homestead Cedar Chest is perfect with its naturally red and gold tones. I scored the paper every 3 inches, with the last rectangle's width to be only 2.5". I snipped a little from the top of that last rectangle and sewed it down. I decorated it a little more using scraps of coordinating pattern papers, closed it up, put it in a clear envelope, and just like that, a homemade red envelope.


Materials Used: SEI Homestead Collection pattern papers, die-cut leaves, Silver Valley button; Other: doilies, Janome Sew Mini Sewing Machine, Mark-It Permanent Markers, Making Memories Slice die-cutting machine

Hope you like what you see here and don't forget to visit the SEI blog to check out what the rest of the design team created!

Thanks for stopping by!
- KRAFTY pearl

Monday, October 31, 2011

Have a Spook-tacular Halloween!

Happy Halloween, everyone! Here to share a classic technique, perfect for today.

One of my favorite ways to decorate for Halloween is to cluster candles to set that spooky mood. The best part is that you get to make any design you want on the candles.

You'll need:
  • ivory or white candles
  • ivory or white tissue paper
  • wax paper
  • stamps and ink
  • heat gun
  • gloves to protect from heat/hot wax
  • scrap paper or craft mat
Make your own designs on candles with these easy steps!
  1. Stamp image onto tissue paper like so:

  2. Layer on stamped tissue paper over candle
  3. Layer wax paper over the tissue paper sandwiching the tissue paper between the candle and wax paper
  4. Slowly heat the wax paper over the stamped image with a heat gun
  5. Lastly, peel the wax paper off and the stamped tissue paper will magically be melted onto the candle
Tip 1: Be careful to keep the tip of the heat gun a safe distance so you don't burn the wax

Tip 2: If you're sensitive to heat, put on protective gloves to keep the heat or hot wax from dripping on your fingers as you handle the candles

Tip 3: Make sure you protect your work surface with either scrap paper or a craft mat to collect any wax drips

Materials: Kaisercraft 13th Hour Clear Stamp; Other: candles, tissue paper, wax paper, Memento ink in Tuxedo Black, heat gun


This really is a simple and classic way to dress up candles for a spooky Halloween look, so it's not too late to give it a try!

Thanks for stopping by!
- KRAFTY pearl

Friday, October 28, 2011

Trick-or-Treat!

Happy Friday! With the Halloween weekend beginning tomorrow, do you have all of your decorations ready?

pearllui-kaisercraft-13thhour-btp-candycorn-600

If you have and want to make some more decorations or if you haven't at all and just want a quick candy tray or centerpiece, you can make this too!

There's something super fun and spooky about the black and white patterns from the Kaisercraft 13th Hour collection. I decided to add bright orange and yellow candy corn to contrast with the black and white. I colored skewers in black, hot-glued them to the nest, tied twine around the skewers several times, hung die-cuts from the back of the paper pad to the twine with clothespins, further embellished with printed chipboard crows and dominoes, and added candy corn - so simple!

Materials Used: Kaisercraft 13th Hour Paper Pad, Printed Chipboards; Other: Whisker Graphics twine, skewers, nest, mini clothespins

Thanks for stopping by!
- KRAFTY pearl

Wednesday, October 26, 2011

Have You Found Your Costume Yet?

Halloween is just a few days away, have you found your costume yet? I reflected on the group costumes my friends and I have worn in the last few years and decided to make a layout from them.

pearllui-kaisercraft-13thhour-layout-halloween-600

The Kaisercraft 13th Hour collection is perfect for Halloween photos. One of my favorite patterns is the Midnight pattern paper. I particularly love the dimension in the design, weaved between the branches are purple and orange patterns. Since the paper is so awesome as is, I wanted to keep the layout simple but echo the dimension. I drew a moon eclipse, cut it using a craft knife, then slipped a printed acetate sheet beneath it to create some more dimension, and lastly added the title "Halloween", created from the Slice machine. I then clustered the photos in a 2x2 grid using various matting techniques.

Materials Used: Kaisercraft 13th Hour Midnight, Evening (front and back), Clocks Acetate, Rhinestones; Other: Fiskars Craft Knife; Making Memories Slice

Visit the Kaisercraft blog for more Halloween inspiration!

Thanks for stopping by!
- KRAFTY pearl

Monday, October 24, 2011

Halloween is Near!

Hope you had a great weekend! Sharing a fun and simple set of cards to get you in the kitschy Halloween mood.

pearllui-kaisercraft-13thhour-card-vampireowl-600

So I thought, wouldn't it be cool to make mini cards using the Kaisercraft's 13th Hour collection? I came up with this when I started drawing out different things that represent Halloween/October to me. Vampires and owls immediately came to mind and with the similar widow's peak shapes they have, I decided to create a pair of these cards playing on their similar shapes. I used a heart punch to create the widow's peaks, and the wings.

Materials Used: Kasiercraft 13th Hour Evening (front and back), Journaling Tags, Pearls; Other: Sizzix Big Shot machine, Nestabilities die, EK Success heart punch

Hope you like what you see here and don't forget to visit the Kaisercraft blog for more inspiration!

Thanks for stopping by!
- KRAFTY pearl

Wednesday, October 19, 2011

Bonjour, Vintage Photos!

Is it Wednesday already? Where has the week gone? As I mentioned in my last post, I started my new gig and I am loving it! So been very busy with my new beginning. :)

In the meantime, here is a simple project I put together using the Kaisercraft Bonjour collection.

pearllui-kaisercraft-bonjour-btp-vintagephotos-400

I have a stack of favorite vintage photos of my parents and I've been meaning to put together a paper bag album to store them. The Bonjour collection is perfect to compliment the photos because of the lovely vintage feel. I cut strips of Bonjour pattern papers and snipped the ends shaped like pennants. I also tossed in some doilies, sewed everything together, scattered photos on the pages and in the kraft bag pockets, tied the package together and just like that, a vintage photo album.

Hope you like what you see and don't forget to check out the Kaisercraft blog for more inspiration!

Materials Used: Kaisercraft Bonjour Provence, Paris, Madeleine, Paper Pad, Journal Tags, Lace Foam Tape; Other: sewing machine, doilies, kraft paper bags, EK Success border punch, Martha Stewart studded heart punch, Big Shot die-cut machine, Nestabilities dies, Whisker Graphics twine

Thanks for stopping by!
- KRAFTY pearl

Monday, October 17, 2011

Project Scrapbox Workbox: Installment #1

Lots of changes this month... lots to be thankful for and lots to look forward to... On the work front, I said good bye to an old company and hello to a new company! I am so excited and I can't wait to jump right in. But the last few weeks have also been so busy wrapping things up and tying loose ends.

On the crafting front, I am excited to share that I made the investment in the Scrapbox Workbox. At first, I was hesitant because the box itself isn't necessarily my style with its traditional furniture look. But after further research, I was convinced it will meet all of my organizational and functional needs. And it did!

pearllui-scrapboxworkbox-organizing-20111019

As you can see, it's still a somewhat unfinished workspace... meaning, I didn't complete all the organization of my craft stuff nor did I finalize the configuration of all the inside shelving. But the point of this post is just to share some things I learned through this huge investment. Installment #2 will be about the finished workspace and how I personalized it to inspire me each time I open the unit.

Research & Decision:

  • I wanted to purchase the unit with a discount, free shipping, and from a company with great customer care.
  • I finally bought it from Legacy Scrapbooking because I personally found the owners, Larry and Lynda, extremely responsive and helpful.
  • Plus, there was a 5% additional discount when you "LIKE" Legacy Scrapbooking on Facebook.
Timeline:
  • 9 days shipping from Utah to my New York apartment (amazing shipping time, if you ask me)
  • 0.5 hours moving and unwrapping the 5 boxes (total weight of 450 lbs.)
  • 5.5 hours building the unit (Thank you, love of my life!)
  • 3 hours configuring the inside shelving (still working on this)
  • Lifetime of craft organization at my fingertips! Love it!
My 'Before' Studio:
  • I had two large craft units (one of them featured in this previous blog post), one small craft drawer, one small book shelf, and a small craft desk scattered around my living room, taking up way too much space.
  • But I loved the eclectic collected look of all the different units thrown together.

pearllui-scrapboxworkbox-drawingbefore-20111019


    My 'After' Studio:
    • I have one large craft unit that magically fits everything craft-related in a highly organized manner!
    • I will be personalizing it further so it feels more like my "studio" and less of just a huge display shelves.


    Next Steps:
    • Personalize the inside of the unit!
    • Come back and check out installment #2 on "Project Scrapbox Workbox"!
    Hope you found this post helpful if you're looking for information on the Scrapbox Workbox and let me know if you have any questions about it!

    Oh, and on a separate note, a great big thank you to Aussie Scrap Source for featuring one of my favorite layouts this past weekend. I used one of my absolute favorite punches on it, the Martha Stewart studded heart punch and now it is also on sale for 25% off at Two Peas!


    Thanks for stopping by!
    - KRAFTY pearl

    Friday, October 14, 2011

    Beaucoup d'Amour: A Check or Money-holder Card

    Happy Friday! Here to share a card made with the lovely Kaisercraft Bonjour collection again.


    There's something incredibly romantic and lovely about the Bonjour collection. I created a tri-fold check or money-holder card. I wanted to just create some sort of balanced art and design in the front of the card that wouldn't be as contrived as the functionality of the inside check pocket. So I created an abstract lantern dangling from the negative of a punched heart which also served as the tri fold part of the card. I then wrapped the card in some red and white twine to finish it off.

    Materials Used: Kaisercraft Bonjour Mairie, Paper Pad, Pearl; Other: sewing machine, Martha Stewart heart punch, Whisker Graphics twine

    Hope you like what you see here and don't forget to check out the Kaisercraft blog for more inspiration!

    Thanks for stopping by!
    - KRAFTY pearl

    Tuesday, October 11, 2011

    Good Times: Beautiful Aruba Wedding

    Happy Tuesday! Here to share a new Kaisercraft collection. Bonjour is seriously gorgeous!


    I am in love with the Bonjour collection. The rich dark tones balance the pale pastel pinks and greens, such a lovely combination! The colors were perfect to compliment photos taken recently at the wedding on the lovely island of Aruba. I wanted to include some memorabilia including a thank you card from the bride and the wedding program, so I created a deep pocket using foam tape.


    Materials Used: Kaisercraft Bonjour Madeleine (front and back), Paper Pad, Journal Tags, Foam Tap. Other: business card pockets, sewing machine, Making Memories Slice

    I love pockets so much that I also sewed on some business card pockets to create a brief flippable picture to reveal two more photos. This is one of my favorite ways to hold more photos and create interactivity on my layouts.

    You have to check out the new collections Kaisercraft's October releases!


    Thanks for stopping by!
    - KRAFTY pearl

    Thursday, October 6, 2011

    "Heart-Air" Balloon Card

    I love me my hearts and hot-air balloons... why not fuse the two together and make something cute! I also love dimension... but dimensional cards are hard to get through the mail without them getting crushed. So today, I’m here to share with you one of my favorite ways to create a dimensional card but still have no issues mailing it.


    pearllui-kaisercraft-sillyseason-thankscard-600

    Here’s what you’ll need: shape punches, scoring tool, embroidery floss

    pearllui-kaisercraft-sept-creativecards-tools-600

    My favorite part is that you can flatten the card to mail it without bulk:

    pearllui-kaisercraft-sillyseason-thankscardflat-600

    And then your recipient can very easily fold the heart balloon right back up:

    pearllui-kaisercraft-sillyseason-thankscardtop-600

    Here's a quick tutorial:

    1. 1. Punch a few shapes (3-5) of the same size and score down the middle of each
    2. 2. Attach shapes to base cardstock with embroidery floss or a strong sewing machine down the scored middle
    3. 3. Fold the shapes up create dimension

    It’s so easy and fun to make, so I hope you’ll try these kinds of cards too. You can use circle shapes to make circle ornaments or bubbles of all sizes. You can use square or diamond shapes to make dimensional kites. The possibilities are endless!

    Materials Used: Silly Season Milk & Cookies (P728), Gingerbread (P729), Friends Rub-on (RB891); Other: Embroidery floss, Bazzill cardstock, EK Success and Martha Stewart punches

    Thanks for stopping by!
    - KRAFTY pearl

    Monday, October 3, 2011

    Joy: A Quick Card

    Here to share a quick card using a super adorable reindeer Christmas Flourish and Sparklets by Kaisercraft. The card puts me in the Christmas mood and I am sooo ready for the holidays!

    pearllui-kaisercraft-sparkletsxmasflourish-joycard-600

    Kaisercraft Christmas Flourishes are perfect painted or bare and the Sparklets are perfect to brighten any project. For this card, I wanted to show how a bare flourish can be dressed up with some Sparklets attached to the reindeer’s antlers as dangling ornaments. Add some twine, a doily, and flag with a simple sentiment, and you have yourself a simple, fun and sparkly card.

    Materials Used: Kaisercraft Flourish Pack – Reindeer (FL364), Sparklets in Rouge (RS416) and Crystal (RS408); Other: Bazzill cardstock, doily, Zig pen, Whisker Graphics twine

    Thanks for stopping by!
    - KRAFTY pearl

    Tuesday, September 27, 2011

    I Love Cookies!

    Sharing a fun layout using the Kaisercraft Silly Season collection today. I love the pinks and greens in the collection. There’s something sweet and fun about the patterns and colors. It’s perfect to highlight photos of sweets, as I did here, with home-baked cookies… a sure sign of Christmas and the winter days! To play off of the sweet factor, I used the pink design from the “Fairy Lights” pattern paper as the background. To play off of the fun factor, I created hanging ornaments and a skewed title.

    pearllui-kaisercraft-sillyseason-cookieslayout-600

    Materials Used: Silly Season Jingle Bell (P722), Fruit Cake (P723), Fairy Lights (P727), Paper Pad (PP851), Journal Tag (JT626); Other: Making Memories Slice, Kate's Paperie ribbon, Whisker Graphics twine, gloss

    Hope you like the layout and be sure to check out the Kaisercraft blog for more inspiration!

    Thanks for stopping by!
    - KRAFTY pearl

    Friday, September 23, 2011

    A Christmas Mini Book

    Happy Friday! Want to make something fun this weekend? How about a quick mini album with just one sheet of paper?

    To make sure I keep my head above water come the busy holiday season, I made this Christmas mini book ahead of time. I used the Kaisercraft Silly Season collection for its fun pinks, greens and pops of reds. I can't wait to start filling it out in December!

    pearllui-kaisercraft-sillyseason-16pgmini-600

    Tip: The Kaisercraft Silly Season “Milk & Cookies” pattern paper is perfect for a mini book because it comes printed with natural 16 mini page delineations. You can Google for all the different ways of making a mini book, but my favorite is the meander mini book because it’s the easiest to make (in my opinion).

    1. Trim paper down to a 4×4 grid, then score at lines shown below:

    pearllui-kaisercraft-16pgmini-tutorial-step1

    2. Cut paper at dotted lines shown below:

    pearllui-kaisercraft-16pgmini-tutorial-step2

    3. Beginning at either end, fold at each scored line in a zig zag accordian pattern until you get to the fourth block where you fold up or down instead of left or right. Simply repeat this until the entire page is folded into a book.

    4. There will be natural “pockets” where the up and down folds are made. You’ll have the option of gluing down the entire pocket or just apply glue in a “U” shape around 3 edges of the page to make a pocket. I made pockets to store journaling tags.

    5. Finally, embellish the mini book with Jewels, Journal Tags, Printed Chipboard, and die-cuts from the back of the 6.5″x6.5″ Paper Pad.

    Materials Used: Kaisercraft Silly Season Milk & Cookies (P728), Gingerbread (P729), Journal Tags (JT626), Printed Chipboard (CB133), Paper Pad (PP851), Jewels (RS424); Other: Ribbon

    It’s super easy and fun to make, so I hope you’ll make one for yourself!

    Thanks for stopping by!
    - KRAFTY pearl

    Tuesday, September 20, 2011

    December 25th on September 20th

    It's time to share some more holiday creations using the Kaisercraft December 25th collection.

    I made a little "peace" sign holiday mobile mixing a bit of both the December 25th and Silly Season collections just to show that the two work great together. I covered each letter with “Noel” from the December 25th collection. To bring some of the Silly Season pink, I added pink pearls to the pattern. I then embellished further and created the ornament mobile arrangement with the Silly Season Printed Chipboard pieces.

    Materials Used: Kaisercraft December 25th Noel (P718), Silly Season Printed Chipboard (CB133), Lace in Cream (EM927), Pearls in Pink Champagne (PL503); Other: Graphic Whiskers Twine

    I then made a card. I love the vintage feel of the December 25th collection and it’s one of the reasons I’m so drawn to it. But I wanted to show the line in a more contemporary light by adding lots of white space and paper-piecing the window. The back side of “Festive” is a lovely white polka dot on green which gives the illusion of snow falling. Add a wreath, a couple layers of matting, and just like that, a simple and contemporary take on a vintage collection.


    Materials Used: Kaisercraft December 25th Festive (P717), Wish (P719), Clear Stamp (CS790); Other: Copic Sketch markers, Memento ink pad

    Hope you like what you see here and don't forget to visit the Kaisercraft blog for more inspiration!

    Thanks for stopping by!
    - KRAFTY pearl

    Thursday, September 15, 2011

    Christmas in September

    While fall is still days away, Christmas and the holiday season are already on my mind. To help get a head start, Kaisercraft released some awesome collections perfect for the holidays. The December 25th collection is traditional with vintage designs and classic reds, greens, and golds. While the Silly Season collection is fun with funky pinks and chartreuse greens.


    Here, I'm sharing a layout using the December 25th collection.


    One of my favorites from the collection is the Foil Specialty Hark pattern paper. It's hard to tell but it has a nice metallic shimmer of foiled accents on the stars and angels. The gold is perfect to compliment the pretty lights of the Rockafeller Christmas tree in my photos.

    To add some contrast to the vintage feel of the papers, I added bright punches of red in form of the satin ribbon and red & white twine. And to further play on the gold lights, I chose one of the gold polka dot pattern papers in the 6.5″x6.5″ paper pad to create the title using Making Memories' Slice.

    Materials Used: Kaisercraft December 25th Foil Specialty – Hark (PS162), Paper Pad (PP850), Collectables Sticker Sheet (SS109), Journal Tag (JT625), Lace in Cream (EM927)
    Other: Graphic Whiskers Twine, Making Memories Slice, Kate's Paperie Satin Ribbon

    Hope you like what you see here and don't forget to visit the Kaisercraft blog for more inspiration from the rest of the design team!

    Thanks for stopping by!
    - KRAFTY pearl

    Monday, September 12, 2011

    A Timeless Dream

    Vacations are always on my mind, a timeless dream, if you will. Here's a layout using Kaisercraft's, appropriately named, Timeless collection.


    The Timeless 6.5" x 6.5" paper pads and rub-ons are gorgeous. The paper pads come in a lovely black & white deck and a vintage deck. The pattern papers have very classic, timeless and versatile designs on them. For my "Dream" layout, I thought I would go for the black & white patterns to contrast with the lovely pastels in my photo.

    I used the Slice cut the title out of one of the pattern papers in the deck. I then applied a mix of navy and spearmint acrylic paint to it as well as the mini journal tag. I created the same effect with the punched flowers, applying a mix of pink and yellow acrylic paint. To create some additional depth and texture, I dry impressed polka dots around the flowers.


    I then added some finishing touches by tying some white twine around the mini journal tag, and applying rub-ons, pearls and pearl brads.


    Materials Used: Kaisercraft Timeless Paper Pad - Black & White (PP855), Timeless Mini Journaling Tags (JT629), Timeless Rub-ons; Pearls in Blush (SB716), Lush (SB717), Bliss (SB718); Pearl Brad in Pink Ice (EM932); Other: twine, Martha Stewart punch, Making Memories Slice