Monday, May 30, 2011

Embody + Quick Acrylic Paint How-to

I love designing my own layouts, but I also really love playing with sketch challenges. I enjoy the challenge of making the sketch mine... incorporating my design style and interpreting it with my own twist.

For what I had in mind, I rotated the Kaisercraft May #1 Saturday Sketch by 90 degrees clockwise. Here's the rotated sketch:

kaisercraftsaturdaysketchmay1

Inspired by the Kaisercraft Saturday Sketch, super cute Paper Smooches Boob Tubes stamp set, and photos of my mom and I as complete mirror images when we were toddlers, I created this layout titled "embody". I love these pics of us because I embody all of her facial expressions and mannerisms. I am my mother's daughter. :)

pearllui-embody-full-400blog

Here's a closer look at the heart pennant banner:

pearllui-embody-detail-400blog

The hearts are one of my favorite parts about this layout. I love the varying shades of pink! If you're interested in making your own painted heart embellishments, here's a really simple tutorial.

You'll need: KaiserColour acrylic paint, Kaisercraft paint brush and punched pattern paper

pearllui-kaisercraftcolourheartstools-400blog

I love KaiserColour acrylic paints!

pearllui-kaisercraftcolourhearts-400blog
  1. Punch out hearts from different pattern papers
  2. Using a paint brush, lightly paint the hearts. Be light-handed so don't over-saturate the heart and cover the original pattern on the paper
  3. Let dry and affix to your layout!
Used: Kaisercraft pattern papers, Kaisercraft KaiserColour acrylic paints in Pretty Pink, Candy and Hot Pink, Paper Smooches Boob Tubes stamps, Close To My Heart alphabet stamps, EK Success heart Paper Shaper, Me & My Big Ideas rhinestone stickers, Wilton doily

This layout so happens to meet this week's Creating Keepsakes challenge to tell the story on one page. I'm all about single page layouts! :)

So whaddaya think?

Thanks for looking!
- KRAFTY pearl

Thanks for linking:

Wednesday, May 25, 2011

CAS-ual Fridays Challenge #3: Bring the Bling

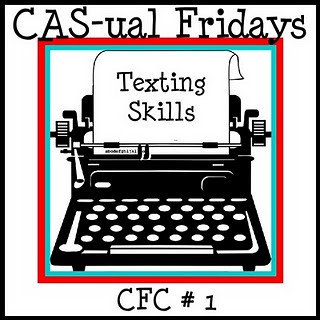
It's once again Wednesday, but here, it'll be another CAS-ual Friday! This week's challenge is "Bring the Bling" in a clean & simple way. Sometimes it's very easy to overdo it with bling, so I'm glad CAS-ual Fridays came up with the challenge.

cas-ualfridays3bringthebling

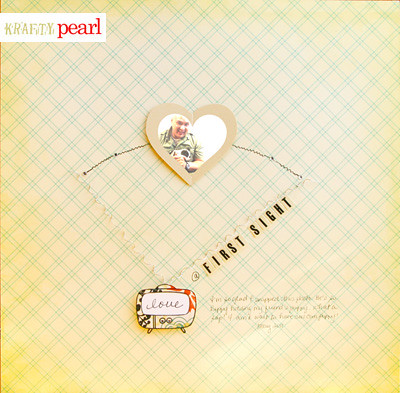
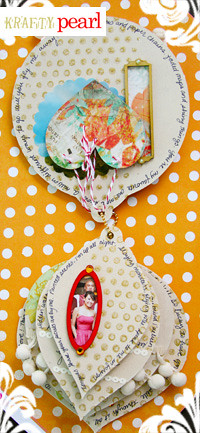
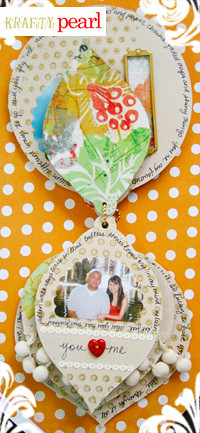
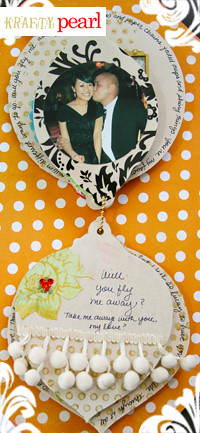
My guy and I love dogs! The other day, we met a friend's 3-month old Boston Terrier puppy. He is one of the cutest puppies ever! I quickly snapped this pic of my guy totally melting while holding the pup. It was certainly "love at first sight"! I loved the moment and the pic, so I just had to scrap it!

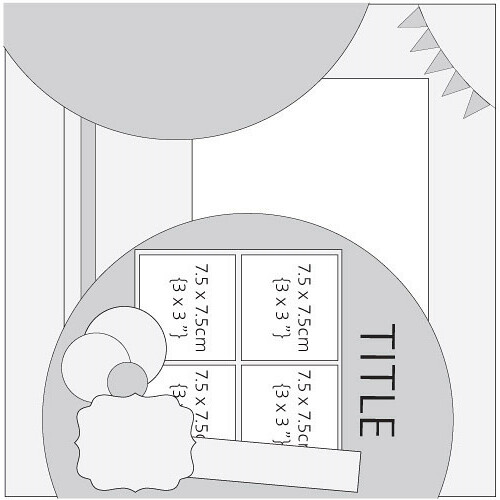
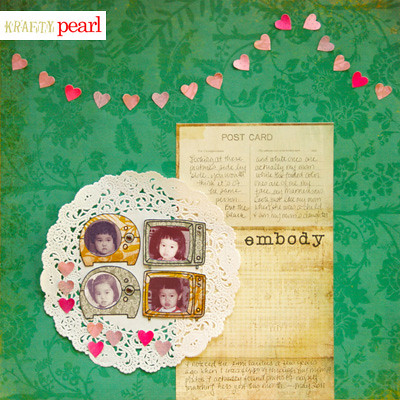
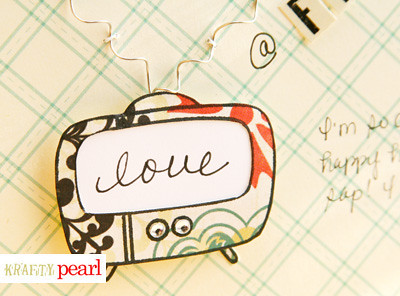
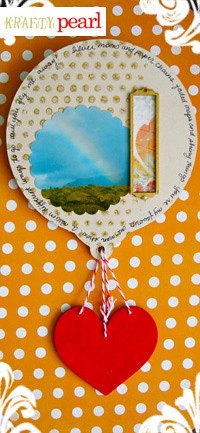
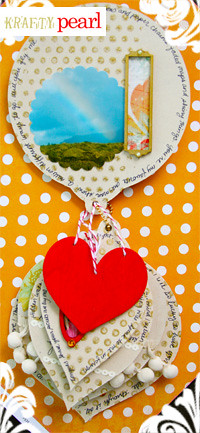
The layout design has been floating in my head since I first saw the Paper Smooches Boob Tube set. I wanted the layout to be cute yet masculine... To achieve "cute", I incorporated a heart, rhinestones as telly knobs and electrical current accents, and the super adorable Boob Tube image. To achieve "masculine", I used muted colors/neutral patterns from Cosmo Cricket's Togetherness collection and Echo Park's For the Record collection, made it a little off-center for the "thrown-together" look, and industrial-looking wire antennas to top off the super cute Boob Tube image.

So whaddaya think? Can cute and masculine coexist? :)

pearllui-loveatfirstsight-blog400

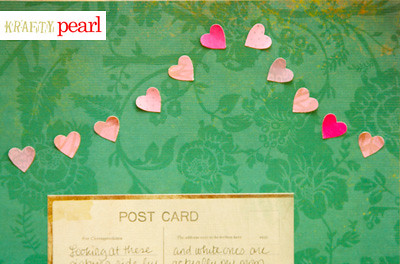
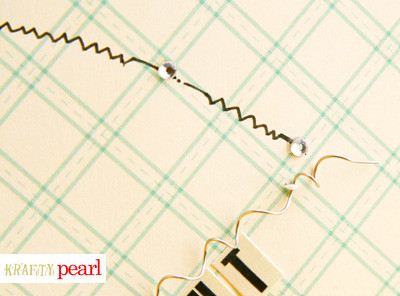
Here's a closer look: The antennas were created by twisting wire around a skewer to desired length. I then removed the skewer and attached the wire to the page with white thread. (It looks invisible.) The electrical current was drawn freehand. The rhinestones and twisted wire give a doubly bling and shiny effect.
pearllui-loveatfirstsight-detail01-blog400

I adore the telly images from the Boob Tube set by Paper Smooches. They're so cute and versatile! Love! To give the layout some additional dimension, I used 3-D pop dots to affix the Boob Tube to the page.
pearllui-loveatfirstsight-detail02-blog400


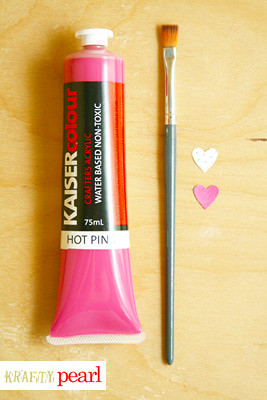
Used: Cosmo Cricket pattern papers, Echo Park pattern papers and alphabet stickers, Paper Smooches Boob Tube stamp, staineless steel wire from my dad's garage stash, Me & My Big Ideas rhinestones, Bic Mark-it markers

Thank you for the great inspiration, CAS-ual Fridays! And thanks to the lovely Girl Fridays who stopped by my last post and so kindly left encouraging comments!

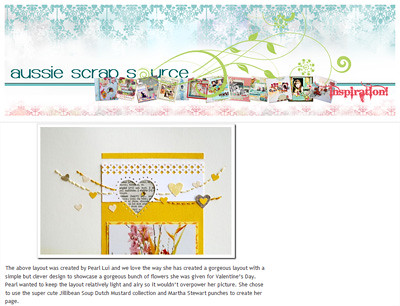
And lastly, a big thank you to Aussie Scrap Source for featuring my "Blooms" layout two weekends ago. I used the Martha Stewart/EK Success punches in many different ways in it and it's one of my favorite layouts. Check out the post for more inspiration!

aussiescrapsourcefeature-400blog

Thanks for looking!
- KRAFTY pearl

Wednesday, May 11, 2011

CAS-ual Fridays Challenge #1: Texting Skills

It may be Wednesday, but it's CAS-ual Friday here! My bestie, a CAS-ual Fridays design team member introduced me to the new challenge blog dedicated to clean & simple design. Its inaugural challenge was posted this past Friday: Texting Skills.

Cas-ualFridaysChallenge-CFC#1-textingskills

One goal crossed off of my 2011 list is: start craft blog. It seems like a simple enough thing to do, but having maintained this blog for the last 4 months, I can say that each post is a mini production on its own. Like a print magazine, there's a photo shoot, copy writing, sourcing, and timely publishing with each post. I would even call it a second 'job' if I didn't love it so much. Being that it's become a large part of my life, I wanted to document it in a clean & simple layout. The title "breaking free" is about having my blog as a platform to speak freely about my creative endeavors.

It was so nice to complete a layout with a simple and straight-forward design. What I loved most about creating this layout is that it challenged me to stay true to my contemporary whimsical craft style while keeping a very clean & simple design. I created dimension and texture with a paper-cutting technique in the title but was still able to keep the design very clean. I think it shows that designing with a CAS style doesn't mean loss of crafting technique! Thanks, CAS-ual Fridays, for great inspiration!

pearllui-breakingfree-400blog


Here's a closer look at my "texting skills":

pearllui-breakingfreedetail-400blog

  • The title was stamped and then following the letters' outline I cut the tops and bottoms leaving the middle of the letters still attached to the cardstock base... it gives the appearance that the title is "breaking free" from the cardstock. :)

  • I then curled the detached parts to make the title pop.

  • I also cut the negative parts of the letters so when I slipped a French-English dictionary page under, the text would fill in the negative parts of the letters, for a double text effect.

Used: Kaisercraft pattern papers; Papertrey Ink Outlines alpha stamps; Bazzil cardstock; EK Success border punch; Fiskars craft knife

Thanks for stopping by and check out the CAS-ual Fridays blog for awesome clean & simple inspiration! Hope you like my interpretation of their first challenge!

-KRAFTY pearl

Friday, May 6, 2011

Crazy for Kaisercraft!

As you can see from my previous posts, I've shared several Kaisercraft projects in back-to-back posts. I'm crazy for Kaisercraft! In addition to the fact that I absolutely LOVE Kaisercraft products, it's also because I decided last month to begin a journey... feverishly working on projects for their 2011-2012 design team call!

I can ecstatically report that I have made it to the final round! See all 25 finalists here. I am so thrilled and honored to be in such great company! I still have a long way to go with the final projects, but a big big big thank you to Kaisercraft for putting me through to round 2!

krafty pearl - kaisercraft 2011 dt 25 finalist

And as if that wasn't exciting enough... "My Red Cabinet" from my 4/26 post is the Kaisercraft April sketch winning layout! Thank you so much, Kaisercraft!

krafty pearl - kaisercraft april sketch winner

Last but not least, I wish all moms out there a very happy early mother's day! My mum is my craft idol. She is a watercolorist, an oil painter, a knitter, a crocheter, and an apparel designer/maker. She does it all!

Here's a card I made for my mum using all Kaisercraft products. One of the reasons I find Kaisercraft products so inspiring is because of the lovely variety and the incredible versatility. They have bright, fun and whimsical patterns but then they also have soft, romantic, vintage designs. I went for the soft, romantic look for my mum's card using this gorgeous flock accent pattern paper. Loves it!

krafty pearl - happy mother's day!

Used: Kaisercraft pattern papers and acetate overlay, Kaisercraft Kaisercolour acrylic paint in pretty pink, Kaisercraft flourish embellishment frame, Heidi Swapp bling, and Sizzix die

Thanks for looking and stopping by!
- KRAFTY pearl

Monday, May 2, 2011

Will You Fly Me Away?

Can it really be May already? Time sure does fly! I created this mini album to wish my special guy a happy anniversary. Inspired by him of course... and by:
  • This super cute song by Annie Little and yes, a very cute Kindle ad. I've wanted to use this song in a project for the longest! The happy beat always puts a smile on my face.

  • The soft romantic colors of KaiserCraft's Lush collection. I especially love the patterns, cherry blossom and maple. I used KaiserCraft's KaiserColour acrylic paint in red to compliment the pretty aqua colors.

  • The lovely bauble shapes of the KaiserCraft bauble tag album. The round bauble reminded me of a hot air balloon and immediately triggered the "Fly Me Away" song in my head.

pearllui-minicover-400blog
Above: One of my favorite KaiserCraft products are the wood flourish embellishment frames. I painted it in a red that I echo in the rest of the mini album.


kaiserminialbum-spread0-400blog kaiserminialbum-spread1-400blog
Above: I designed the album so that as soon as the cover is flipped, the album looks like a hot air balloon. I really like that I can take apart the album to just show the cover bauble and heart and hang that as room decor. I painted all of the bauble tags with KaiserColour acrylic in antique white as the base color. I then stamped polka dots on the using KaiserColour acrylic paint in gold. Tip: Apply acrylic paint onto your rubberstamp with a wide flat paint brush to get an even layer of paint.


kaiserminialbum-spread2-400blog kaiserminialbum-spread3-400blog
Above: For this album, I wanted it to be a cross between card (with lots of handwritten elements) and a mini album (with pictures that follow our journey through this last year). I painted wood flourish embellishments with KaiserColour acrylic in red and gold with a rough flat brush to get in the grain.


kaiserminialbum-spread4-400blog kaiserminialbum-spread5-400blog
Above: Mod Podge is awesome to adhere pattern paper over the tags, even the acetate overlay! Although the acetate overlay is clear, an even coat of Mod Podge did the job, drying clear for a seamless attachment to the bauble tag. I hand-cut flowers from KaiserCraft pattern paper and adhered some more pom pom ribbon to add some softness to the mini album.

Used: KaiserCraft pattern papers, acetate overlay, wood flourish frames, blooms, KaiserColour in gold and antique white; Me & My Big Ideas bling; EK Success border punch; Michael's heart wood shape; Whisker Graphics twine; EK Success scallop circle and circle punch; Hero Arts polka dot background rubber stamp; M&J Trimming pom pom ribbon; Jenni Bowlin button; DMC embroidery floss; Bic Mark-it markers; Mod Podge; Glue dots

So whaddaya think?

Thanks for stopping by!
- KRAFTY pearl


Thanks for linking:
Get Your Craft On Tuesday
Tip Junkie handmade projects