Showing posts with label sewing. Show all posts

Tuesday, May 28, 2013

Project Scrapbox Workbox: Installment #2

I've been getting things back in order... both cleaning and organizing around the apartment.

Since I got the Scrapbox Workbox almost two years ago, I've had it neat, tidy, and closed for maybe a total of 5 days. It sits in the middle of my living room and since I'm constantly using this station, I've wanted to add a fabric panel to conceal my mess for quite some time.

But first, I actually had to clean my table top mess to even tackle sewing a fabric panel. Here's the whole transformation via Vine.


Materials used: Ikea fabric, Singer sewing machine, Velcro

Wait, this is Installment #2? Where's Installment #1? Here you go.

Thanks for stopping by!
- KRAFTY pearl

Thursday, February 14, 2013

Spotlight on SEI: Happy Valentine's Day

Dropping in to say Happy Valentine's Day!

Check out this banner I created using lovely SEI From Your Secret Admirer Think of Me Die-Cuts.


My theory about Valentine's Day is that everyday should be Valentine's Day! So show your sweetheart and loved ones lots of love every single day! :)

Thanks for stopping by!
- KRAFTY pearl

Friday, October 19, 2012

Mama Elephant Highlight: Good Times

TGIF! It's been a long work at my day job, but I've been able to complete all my highlights and posts as soon as I get home every night. We end this week with a look at Mama Elephant's Good Times set.


Mama Elephant's Good Times is truly one of the most versatile sets I have ever seen. From the cool and current sentiments to the three perfect balloons and cute icons, this set is a must have!


Materials used: Mama Elephant Good Times, Believe in Magic; Tsukineko Delicata Ink in Golden Glitz, Singer 160 Limited Edition sewing machine


A closer look: When I say versatile, I really mean it. The balloons when turned upside down make perfect ornaments! I used the ribbon stamp from the Good Times set. I also used the reindeer and stars stamp from the Believe in Magic set which fits so well into these balloons/ornaments. I added some stitches to the card to finish off the ornament card.

Don't forget to check out the projects from the other Mama Elephant design team members here:
Thanks for stopping by!
- KRAFTY pearl

Tuesday, July 10, 2012

She's All Mine!

After wavering for months on whether or not I should get the beautiful Singer 160 limited edition sewing machine, thanks to my husband, I didn't have to make a decision. She's all mine!


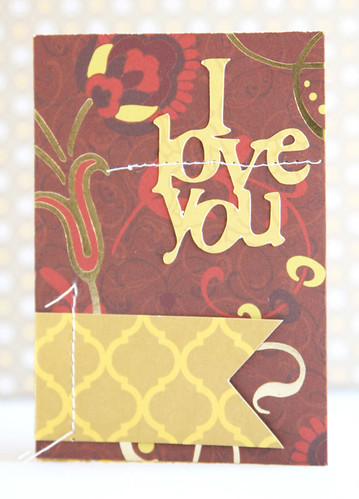
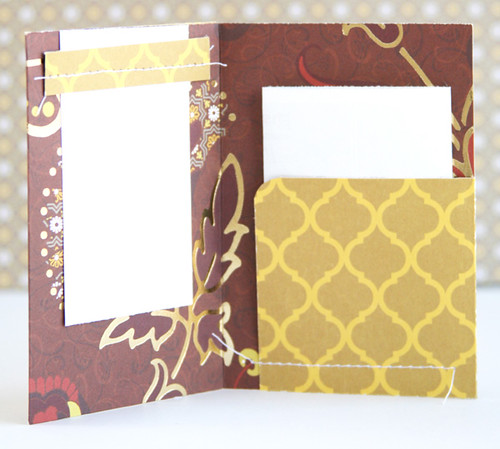
I have sewn some cards and stitched up a dress so far. I can't wait to sew more with her. Such a smooth piece of computerized machinery. Here's a new card I made with the sewing machine. I loved it so much, I put up the design in my Etsy shop.


Materials used: cardstock, tissue paper, Singer 160 Limited Edition sewing machine

Thanks for stopping by!
- KRAFTY pearl

Monday, March 12, 2012

Three of a Kind

One of my favorite photography techniques for creating a symmetrical and cohesive scrapbook layout is to use three photos with similar shapes.


Materials Used:
Kaisercraft Tigerlilly Blush Double-sided 12"x12" Paper, Flamingo Double-sided 12"x12" Paper, Collectables Die-Cuts, Chipboard Alpha 1; Other: Classic Heart Spellbinders Nestabilities Dies, Janome Sew Mini Sewing Machine

My fiance and I took photos of each other in front of a lancet doorway. I then snapped another photo of the green rolling hills of Napa framed by another lancet window. Put them side by side and I have myself an interesting layout using very simple design principals - symmetry and repetition!

Highlight the colors from the photos with beautiful bright pinks and oranges from the Kaisercraft's Tigerlilly collection, sprinkle some hearts, and I have a simply fun layout. If you love strong contrasting colors in classic prints, you'll love the Tigerlilly collection and it's especially perfect for the spring and summer months.

Hope you like this technique and don't forget to visit the Kaisercraft blog for more inspiration!

Thanks for stopping by!
- KRAFTY pearl

Sunday, January 1, 2012

Happy New Year! To New Beginnings!

Happy New Year! I can't believe it's already 2012!

Hope you've had a great holiday and break. I took a short break from blogging to enjoy family, friends, feasts, and holiday cheer. But I'm back, fully refreshed and ready to share lots of new projects!


Today's project is fun, sentimental, and perfect for New Year's! I created an interactive layout to store letters my fiance and I wrote to each other on New Year's Eve. It's sorta this tradition we started and now I have an album set aside just to store our annual letters. 

Some techniques to note:
  • Two pockets have been created by sewing the Hambly screen print to a piece of cardstock.
  • In the first pocket, I put sequins to further create a festive feel.
  • The second pocket was created by cutting a slit following the banner curve in the screen print and it holds the letters.

You'll need these supplies:

Directions:
  1. On the Banners overlay, follow one of the banner rows with a craft knife and then punch small holes at the start and end of the slit
  2. Then align the overlay over the cardstock, sew a pocket to fit your own letters, more photos, or any other keepsakes
  3. Then simply sew 3 of the 4 edges together, sprinkle some sequins in, and finish sewing the 4th edge.
  4. Above the pocket, I added a small stack of mixed overlays and white tissue paper, and topped it off with a photo of us.

These are some of my favorite techniques and one of my favorite traditions, so I hope you'll give them a try!

Don't forget to check out the Hambly blog for more inspiration!

Thanks for stopping by!
- KRAFTY pearl

Tuesday, December 13, 2011

Staying Organized in December

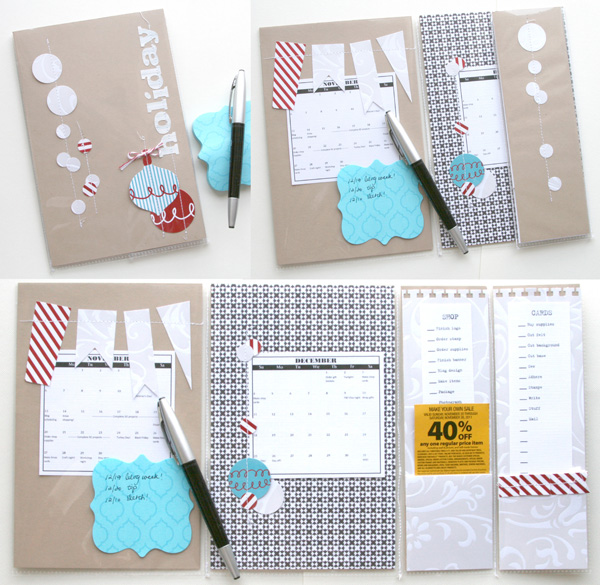
I find it particularly hard to keep it all together in December, largely due to all the events, gift buying, and new year planning. Don't get me wrong, it's my favorite time of year. Lots of tying up loose ends as well as beginning new plans and resolutions. So the remainder of December's projects will be things crafted to help me stay organized through the end of the year. I'll let you know how I do with my newly crafted organization tools come January. :)

If you're like me, you have tons of post-it notes floating everywhere with all kinds of lists that are always at the wrong places when you need them. Welp, my solution this year is to keep a pocket organizer just for the last two months of the year when all the hustle and bustle occurs.

pearllui-sei-dec-holidayplanner-composite-600

Materials Used: SEI Holiday Cheer, White Elegance collections; Janome Sew Mini Sewing Machine, circle punches

Inside there's a November and December calendar, a lists of various to-do's, a place to collect coupons and slip in anything else such as receipts from gift purchases, etc.

To create the organizer, I sewed three 5 1/2 x 8 sheet protectors together. The third sheet protector was sewn in half. I then cut a slit in the middle of the pockets for coupon and receipt storage. (Yep, that's a Michael's coupon.)

So far this system has proven to work quite well for me. The best part about this is that once this year completes, I have all of my lists and plans all stored and documented in one place. And, next year, I'll be able to look at all of my lists from this year.

Hope you like this idea and be sure to check out the SEI blog for more inspiration!

Thanks for stopping by!
- KRAFTY pearl

Tuesday, November 29, 2011

Thankful for Simple Pleasures

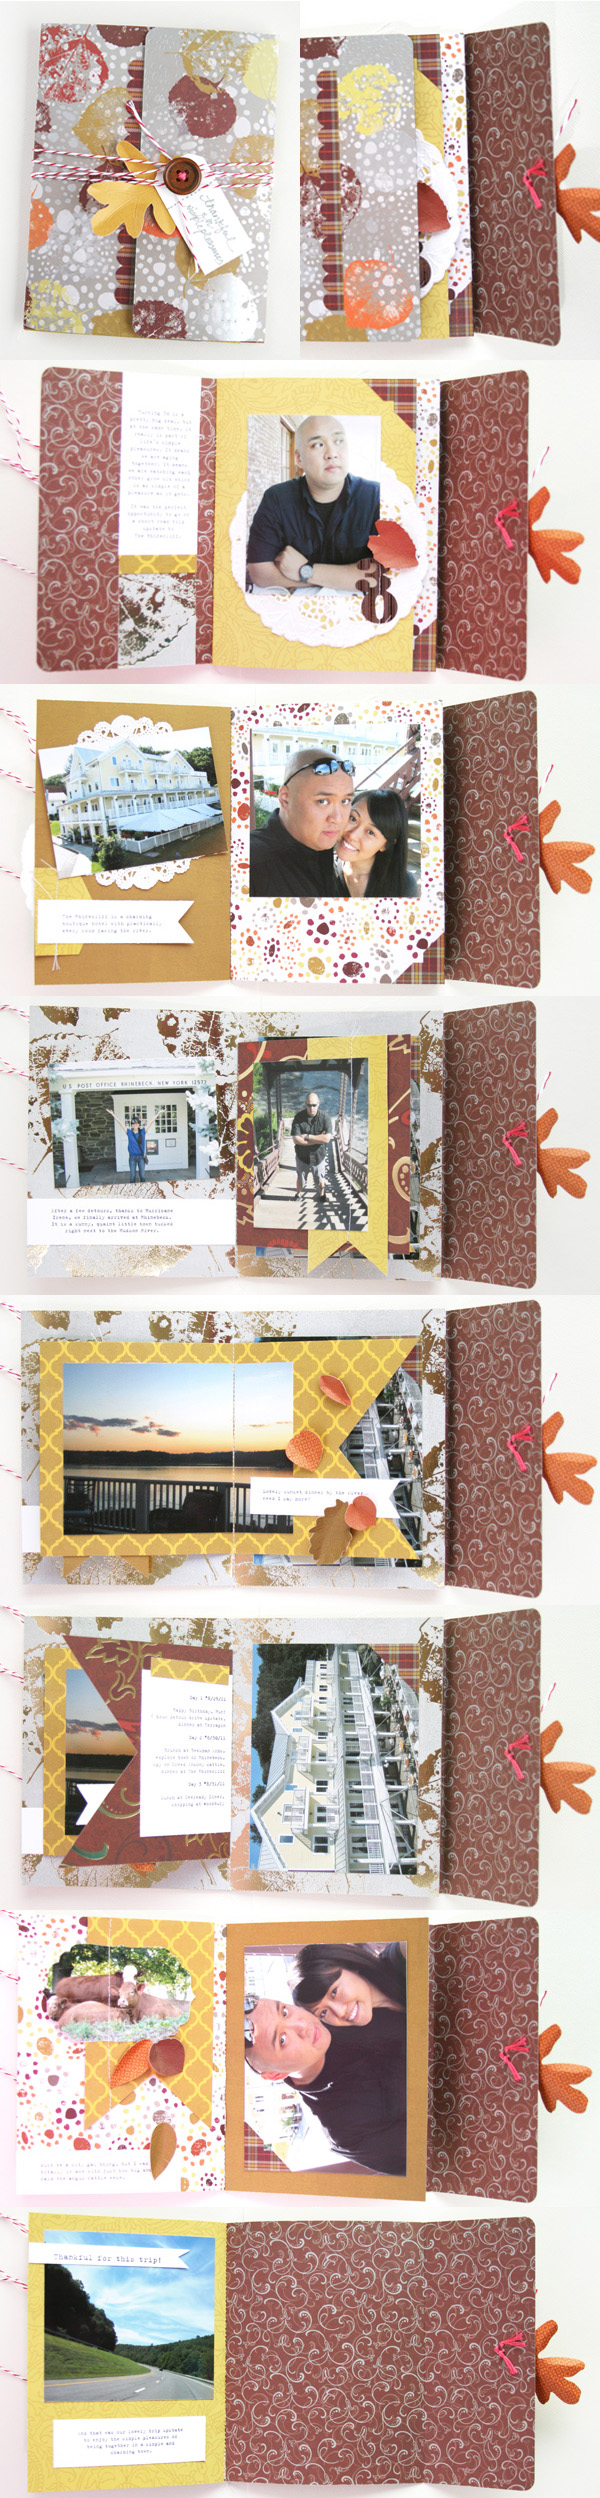
To round off November, I'm sharing a project I made using the awesome SEI Homestead collection. I made a mini book to document a lovely trip to upstate NY.

pearllui-sei-nov-homestead-mini-composite-600

Materials Used: SEI Homestead Collection pattern papers, stickers, die-cut leaves, Silver Valley button; Others: Whisker Graphics twine, embroidery floss, doilies, Big Shot die-cut machine, die, markers, Janome Sew Mini Sewing Machine


SEI pattern papers have this great thick quality to them making sturdy mini album pages and a cover. Some interesting things to note in the mini is how it is made up of just 4 pieces of paper scored and sewed together using a sewing machine. The design is just as interesting because the cover is actually a tri-fold so there is a flap that flips over the front cover and when the flap is opened, it reveals staggered pages. Lastly, a long piece of twine is wrapped around the album several times and securered to a button to keep the bulky pages of the book enclosed in a neat little package.

And remember to check out more inspiration on the SEI blog!

Thanks for stopping by!
- KRAFTY pearl

Tuesday, November 22, 2011

Thankful for Being "Best Dressed"...

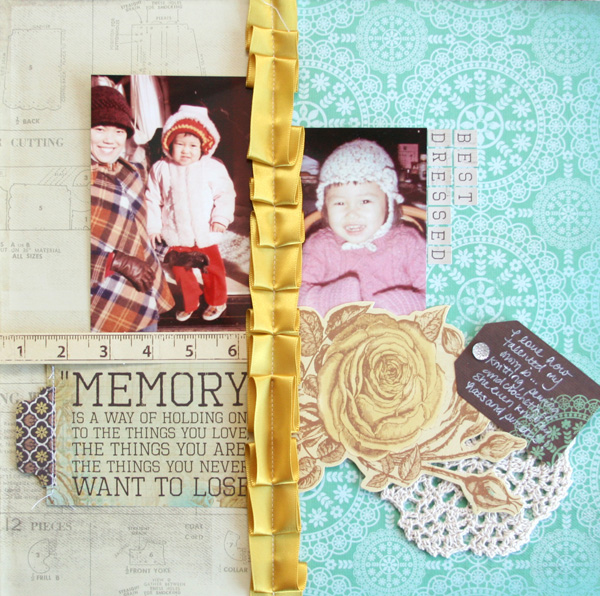
Well, not really for being "best dressed" but rather, I'm thankful for my parents! I was going through a ton of old photos last month and I came across these showing some of the items my mom had sewn and knitted for me when I was a kid. Of course, the vintage feel of the lovely Kaisercraft Madam Boutique collection was perfect for these old school photos.

pearllui-kaisercraft-madame-layout-bestdressed-600

Materials Used: Kaisercraft Madam Boutique Blouse pattern paper, Madam Boutique Collectables, Alphas 12 x 12 Sticker Sheet, crochet doily; Other: Janome Sew Mini Sewing Machine, satin ribbon, white pen

I'm so glad my dad took these photos, because this gives me a glimpse into their lives before I could remember. So as you celebrate Thanksgiving this week, don't forget to have your camera with you to capture all your merry moments, and most importantly, live in those moments and be present! If I don't get to come back on the blog before Thanksgiving Day, have a very happy turkey day!

Thanks for stopping by!
- KRAFTY pearl

Wednesday, November 16, 2011

Thankful for My Fave Munchkins

I can't believe it's mid-November already! I thought it'd be fun if I started a "thankful" series for the remainder of the month. I'm still super happy and thankful to have made the Hambly team! But today, I'm hear to share some layouts I made with this month's new Kaisercraft releases.

I'm thankful to be a proud godmom to these super sweet and yummy little munchkins. They always manage to make me smile, and how can I not? Just look at these cuties!


Materials Used: Kaisercraft Cock-a-doodle-doo! Meow! and Woof! pattern papers, Neigh! 12 x 12 gloss specialty, foam tape; Other: Janome Sew Mini Sewing Machine

The Kaisercraft Cock-a-doodle-doo! collection is perfect for fun layouts of farms, parks, gardens, etc. But here I used the fun papers to create a layout about my lovely godchildren. I cut strips of paper and banner and adhered them to the layout using a messy double zig zag stitch around the page. I also cut animal shapes from the Neigh! pattern paper. So simple and fun!

Don't forget to check out the Kaisercraft blog for more inspiration!

Thanks for stopping by!
- KRAFTY pearl

Friday, November 11, 2011

"Leaf" It Up to SEI...

TGIF! I was out of the country for a friend's wedding for a few days last week, so it's been a bit quiet here. But I've got lots to share in the coming weeks, so stay tuned!

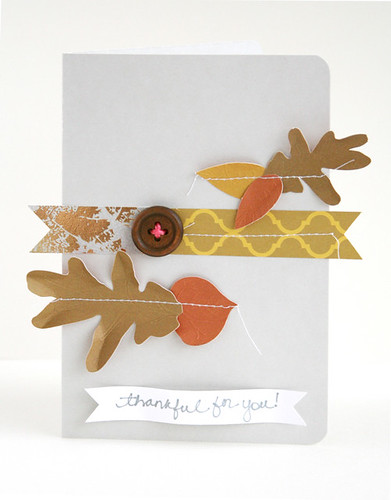
I love SEI... why? "Leaf" (har har) it up to SEI to manufacture sturdy and crisp pattern papers, cardstocks, and die-cuts, they're awesome! Here are two simple anytime cards made primarily with the SEI Homestead Collection.

First, I made a simple card using the fall foliage die-cut leaves. I absolutely love the clean yet crinkly shapes of the leaves, so to play off of them, I created a homespun design using strips of scrap paper to create a banner. To echo the banner shape and organic feel of the card, I also created a simple banner with the handwritten sentiment of "thankful for you". This is a super easy, fun, and great way to use up scraps!


Materials Used:
SEI Homestead Collection pattern papers, die-cut leaves, Silver Valley button; Other: doilies, Janome Sew Mini Sewing Machine, Mark-It Permanent Markers

Then, I made a red envelope as a gift to one of my friend's newborn's 100th day celebration. In the Chinese culture, whenever there is a new born celebration, a red envelop is always in order. They're most popular during the Chinese New Year celebration when married adults hand them out to children of family and friends.

pearllui-sei-nov-homestead-redenvelope-600

Here I used a single strip of 4"x 11.5" pattern paper. The Homestead Cedar Chest is perfect with its naturally red and gold tones. I scored the paper every 3 inches, with the last rectangle's width to be only 2.5". I snipped a little from the top of that last rectangle and sewed it down. I decorated it a little more using scraps of coordinating pattern papers, closed it up, put it in a clear envelope, and just like that, a homemade red envelope.


Materials Used: SEI Homestead Collection pattern papers, die-cut leaves, Silver Valley button; Other: doilies, Janome Sew Mini Sewing Machine, Mark-It Permanent Markers, Making Memories Slice die-cutting machine

Hope you like what you see here and don't forget to visit the SEI blog to check out what the rest of the design team created!

Thanks for stopping by!
- KRAFTY pearl