Monday, March 28, 2011

Le Petit Foyer

Lately, I've been learning to be a better blogger by taking clearer photos to go with blog posts, scheduling them on a weekly basis and of course staying extremely motivated to create things that will allow me to continue sharing layouts and ideas. So bear with me!

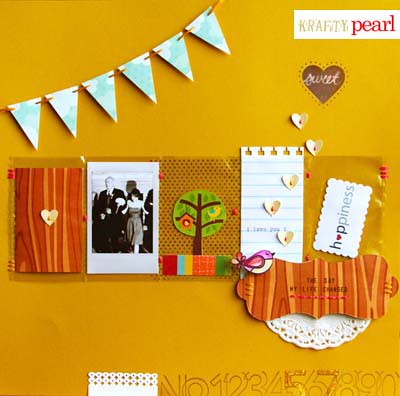
This week I'm sharing a layout I made about one of my fave places in my apartment, my foyer. It happens to meet two challenges on Two Peas. Check out the challenges or submit your layouts here: Studio Calico and Love Bug: Stitch a shape on your page.

About my foyer: it is a bit small and not at all fancy, but it's mine and I love it. Every time I come home, I'm greeted by some of my favorite photos on my bright sunny yellow Trollsta sideboard from Ikea and no matter how long my day was, it brings a smile to my face.


blog-studiocalicotwopeaschallengepearllui

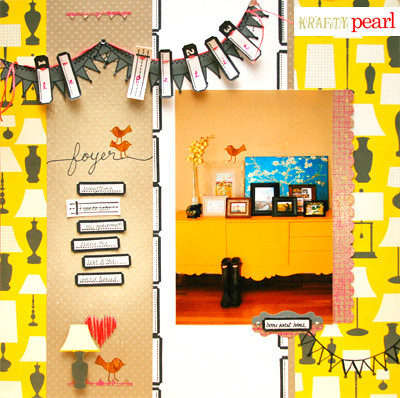
Used in this layout: pattern papers from Studio Calico, Hambly Screen Prints; mist by Studio Calico's Mister Huey; stamps from Studio Calico, A Muse; bird rub-ons by Studio Calico; embroidery floss by DMC; and cardstock from Bazzill Basics and Close To My Heart.


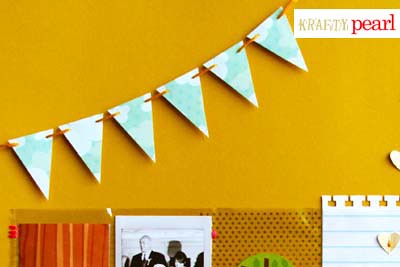
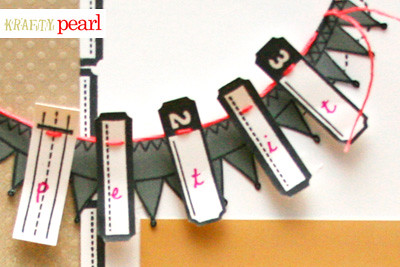
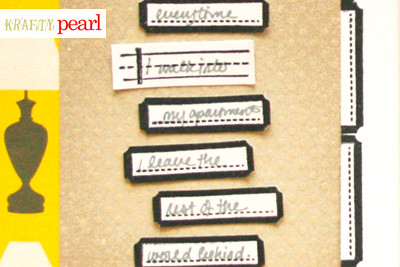
Here's a closer look. Label pennants made by stitching Studio Calico stamped labels:
blog-studiocalico4


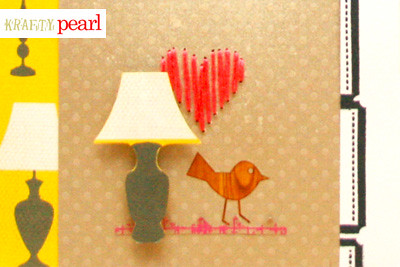
Hand written 'foyer' title embellished with Studio Calico rub-on birdies:
blog-studiocalico1


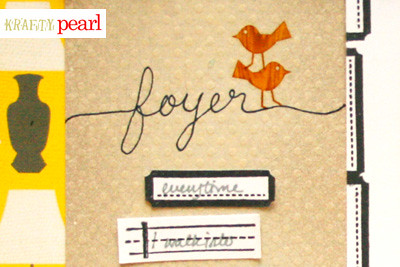
Journaling: 'Every time I walk into my apartment, I leave the rest of the world behind.'
blog-studiocalico2


Hand-stitched heart/paper piercing:
blog-studiocalico3

Hope you enjoyed my layout and the challenges from Two Peas!

By the way, I'm now on Pinterest and totally loving it. To the right of this post, you'll find all of my boards. Check them out and let me know if the pics inspire you the way they did for me!

- KRAFTY pearl

Friday, March 18, 2011

Good Ol' Crepe Paper Roses

Crepe paper roses... remember those jammies from way back when? I remember folding bouquets of these for my mom and friends as far back as junior high school. Recently, I decided to incorporate some of these roses in a scrapbook layout. And since then, it's been a favorite flower making technique for me.

Making your own flowers is the trend right now and Cosmo Cricket has a challenge to make your own flowers on their blog. So here's what I made. A simple stamped tag embellished with a glitter-dusted crepe paper rose.

blog - crepe paper rose tag

Used: Warble Dear Lizzy Large Clear Acrylic Stamp Set by American Crafts, crepe paper streamer from Party City :), Martha Stewart glitter


Here's a closer look at the roses:

blog - crepe paper roses details 1


And they're really cute just set up on my desk. Beats real roses because they don't need any maintenance! :)

blog - crepe paper roses details 2

Want to make these for yourself? I have a tutorial below but I encourage you to search for 'crepe paper roses' on Google to find all the different ways of folding and see which technique/end result you'd like to try. Each artist folds them just slightly different giving the roses a different appearance.

Here's my tutorial of the method I learned long ago.

What you'll need: crepe paper streamer (approximately 1.75" width), clear liquid adhesive, old plastic bristle brush for applying glue, washi or flower tape, glitter

blog - crepe paper rose tools


How to:
  1. Cut strips of crepe paper ranging from 18-24 inches. The longer the crepe paper, the fuller and likely tighter your rose will appear. My roses shown above use 24" strips of crepe paper.
  2. Follow steps 1 through 7 in my illustration below.
  3. Brush on some clear liquid adhesive and dust on glitter to add some sparkle and there you have it, crepe paper roses!

blog - crepe paper rose folding instructions


Hope you enjoyed my tutorial!

Update: One last pic of pink roses turned orange using Smooch Spritz in gingersnap (yellow) and some orange glitter. After I let the ink dry, I painted the roses lightly with liquid glue and dipped them into the glitter. So you can actually use any color crepe paper and change its color through spray inks for another take on them.

blog - crepe paper roses smooch spritz glitter

- KRAFTY pearl


P.S. Follow my blog with bloglovin

Sunday, March 13, 2011

I ♥ Pockets! Don't you?

From envelopes to business card pocket page protectors, I love all kinds of pockets! I especially love to use them in layouts to organize and tuck in bits and pieces of journaling, photos, etc., like this:

blog - five seven layout

Used in this layout: Old business card pocket sheet (similar to this) cut in half; My Little Shoebox bird stamp, pattern papers; Stampin' up roller numbers stamp; Martha Stewart heart all over the page punch; EK Success border and heart punches; Adirondack pigment inks; Stickles; basic letter stamp set (love this one from Staples); 3D Dots; transparency; watercolor

Here's a closer look:

Hand cut pennants from cute My Little Shoebox pattern paper stitched together with embroidery floss and adhered to layout with 3D Dots:

blog - five seven layout detail 1


Punched hearts folded in half and secured with embroidery floss; LOVE the Martha Stewart heart all over the page punch! Used it to punch a 'window' backed by a pigment ink stamped transparency:

blog - five seven layout detail 2


Hand cut label shape by tracing MLS cardstock label remnant used as template; Stickle glittered embellishment to highlight the date of 5/7:

blog - five seven layout detail 3


Hand stitched details to secure page protector to cardstock; watercolored stamped MLS bird image:

blog - five seven layout detail 4

Don't you just love pockets too!?

P.S. I'm now on Two Peas in a Bucket, Scrapbook.com, and Flickr!

- KRAFTY pearl