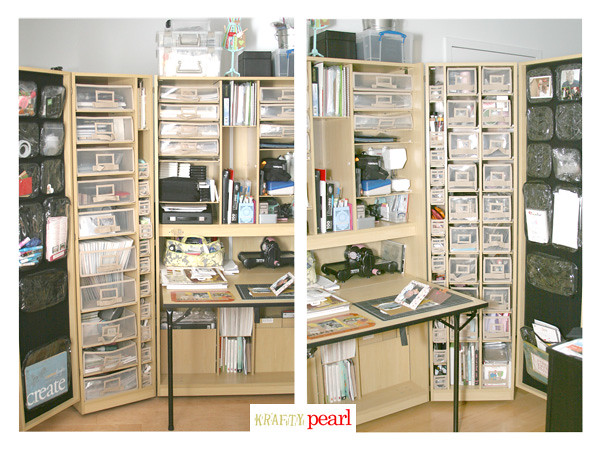
On the crafting front, I am excited to share that I made the investment in the Scrapbox Workbox. At first, I was hesitant because the box itself isn't necessarily my style with its traditional furniture look. But after further research, I was convinced it will meet all of my organizational and functional needs. And it did!
As you can see, it's still a somewhat unfinished workspace... meaning, I didn't complete all the organization of my craft stuff nor did I finalize the configuration of all the inside shelving. But the point of this post is just to share some things I learned through this huge investment. Installment #2 will be about the finished workspace and how I personalized it to inspire me each time I open the unit.
Research & Decision:
- I wanted to purchase the unit with a discount, free shipping, and from a company with great customer care.
- I finally bought it from Legacy Scrapbooking because I personally found the owners, Larry and Lynda, extremely responsive and helpful.
- Plus, there was a 5% additional discount when you "LIKE" Legacy Scrapbooking on Facebook.
- 9 days shipping from Utah to my New York apartment (amazing shipping time, if you ask me)
- 0.5 hours moving and unwrapping the 5 boxes (total weight of 450 lbs.)
- 5.5 hours building the unit (Thank you, love of my life!)
- 3 hours configuring the inside shelving (still working on this)
- Lifetime of craft organization at my fingertips! Love it!
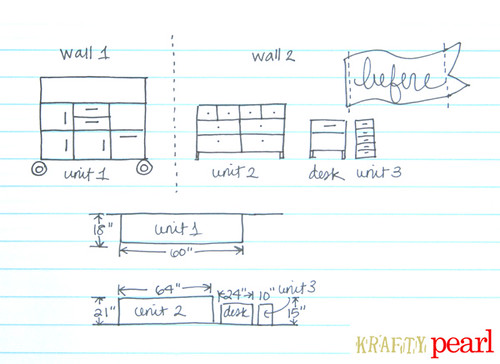
- I had two large craft units (one of them featured in this previous blog post), one small craft drawer, one small book shelf, and a small craft desk scattered around my living room, taking up way too much space.
- But I loved the eclectic collected look of all the different units thrown together.
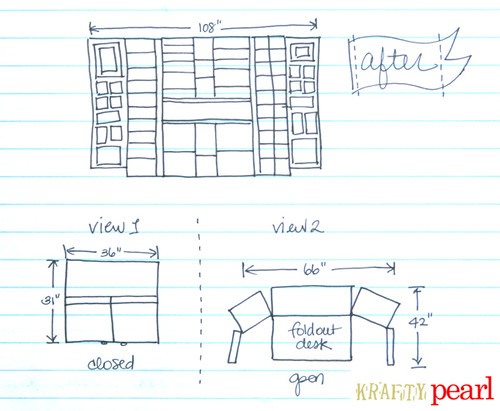
My 'After' Studio:
- I have one large craft unit that magically fits everything craft-related in a highly organized manner!
- I will be personalizing it further so it feels more like my "studio" and less of just a huge display shelves.
- Personalize the inside of the unit!
- Come back and check out installment #2 on "Project Scrapbox Workbox"!
Oh, and on a separate note, a great big thank you to Aussie Scrap Source for featuring one of my favorite layouts this past weekend. I used one of my absolute favorite punches on it, the Martha Stewart studded heart punch and now it is also on sale for 25% off at Two Peas!
Thanks for stopping by!
- KRAFTY pearl


Love reading the breakdown of the time investment in your new organizational piece...wow. Can't wait for installment #2.
ReplyDeletecrazy!
ReplyDeletewow... i dont think it would be enough space for me but i loooooooove all those boxes and secrets lol :D Hugs Janna
ReplyDeleteLooks amazing!!! Can't wait to see installment 2!
ReplyDelete