Monday, January 30, 2012

The Things I Make For Sale

Happy Monday! Hope you've had a great start to the new year. I've had a busy start to 2012, but no complaints here! I love being busy, but I also wish I could keep up with blog posts too. I'm finally catching up, so I have lots to share.

Today, I thought I'd share my journey to starting an online shop and selling things I make and package with my own two hands. It's been a long-standing dream for me to start selling things I make online. As a full-time online marketing nerd by profession working 10-12 hour days and a night/weekend craft enthusiast, it's hard to find time to act on such a dream. But at the end of 2011, I embarked upon a simple solution to making this real, my own Etsy shop. The best part is my commitment to help the fight against cancer. It's a cause that is near and dear to my heart, so I donate 20% of annual sales from this shop to the cause. Details here.

As part of my seller journey, I even participated at a holiday craft fair at work and sold greeting cards and ornaments. It was so much fun and very encouraging to receive positive feedback on the goods.


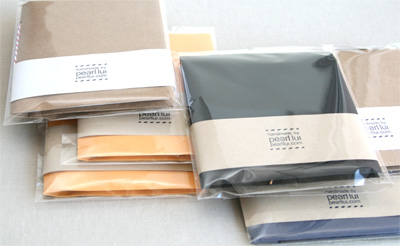
The Etsy shop started with greeting cards and boxed card sets. But I have now expanded to include some super fun envelope travel jotters or memo books.


You can slip receipts, business cards, instant photos, or any other memorabilia directly into the envelope! Plus, I've designed the books to offer flexibility as a reporter style or memo style book.

They're great to toss into your purse or your travel tote for quick note taking or a simple travel mini scrapbook. Here's something I created recently with my weekend trip to San Francisco.


This journey to designing and making more products for my Etsy shop had taken a backseat for so long, I'm so glad I finally made some time to get it up and running.

Do you have your own Etsy shop? Let me know what it is and I'd love to add you to my circle! Have you always wanted one but procrastinated? It's 2012 and there's no better time than now! :)

Thanks for stopping by!
- KRAFTY pearl

P.S. If you've reached my blog from Etsy, please enjoy a 10% discount with the coupon code KRAFTY as a thank you for stopping by.

Saturday, January 7, 2012

Make Your Own Photobooth & Props

Happy weekend! Photobooth-style photos, mustache props, and bow-tie props are all the rage these days. But you don't need to go to a photobooth to get that style. Today I'll be sharing two tips in one! And I bet you will have so much fun giving this a try this weekend!


Materials Used: Kaisercraft On The Move Cylinders; Other: skewers, glue dots

Make Your Own Mustache & Bow-tie Props

You'll need:
  • colorful pattern paper
  • skewers
  • glue dots
  • scoring tool
  • a good doodling hand
  • pencil + eraser

How-to:
  1. Score and fold your pattern paper in half
  2. Following a similar doodling pattern as the above, use a pencil to draw the shapes right next to the fold
  3. Cut the shapes and unfold the paper to get a perfectly symmetrical mustache or bow-tie
  4. Stick to skewers with glue dots
Make Your Own Photobooth

You'll need:
  • camera with timer + flash + tripod
  • a clean background
  • don't forget your props!
  • photo/image editing software
How-to:
  1. Set up your camera, timer, flash, and tripod to face about 4 feet away from your blank wall
  2. Click your timer and any continuous snap features you may have
  3. Stand in front of your blank wall and let the camera snap you in funny poses
  4. Once you have your photos, just create a stacked strip of images using any editing software
Now go on, have fun and be silly!

I have also been playing around a lot with Incredibooth for the iPhone which creates photobooth style pictures for you automatically! (Thanks, Wynne!)

Speaking of which, let me share my fave iPhone photo apps:
  • Hipstamatic - (app here, more details here)
  • Incredibooth - (app here, more details here)
  • Instagram - (app here, more details here)
Hope you enjoyed this tutorial and playing with some of the above apps!

Thanks for stopping by!
- KRAFTY pearl

Wednesday, January 4, 2012

Getting Organized: Tape Holder Shelf

It's January, so it's time to get organized! I've accumulated a small collection of tape and I've been looking for a flexible system to store them. Here's what I made:


Materials Used: Kaisercraft Sweet Nothings You & Me, Acrylic Paint in Gold, Mini Drawers; Other: Mod Podge

I love Kaisercraft's mini drawers because it's up to you with how you want to use it. Perhaps you have need for all the small compartments to hold beads or small findings. For me, the foundation shelf for the mini drawers was perfect to store all of my tapes. I love how it can stand horizontally like a bin or vertically like a shelf.

And it was so easy to make! I first painted the entire piece with gold acrylic paint. I then carefully adhered all of the paper to the shelf using Mod Podge. I then clipped a medium sized binder clip to hold my mini scissors which are perfect to snip tape. So simple and easy!

Thanks for stopping by!
- KRAFTY pearl

Sunday, January 1, 2012

Happy New Year! To New Beginnings!

Happy New Year! I can't believe it's already 2012!

Hope you've had a great holiday and break. I took a short break from blogging to enjoy family, friends, feasts, and holiday cheer. But I'm back, fully refreshed and ready to share lots of new projects!


Today's project is fun, sentimental, and perfect for New Year's! I created an interactive layout to store letters my fiance and I wrote to each other on New Year's Eve. It's sorta this tradition we started and now I have an album set aside just to store our annual letters. 

Some techniques to note:
  • Two pockets have been created by sewing the Hambly screen print to a piece of cardstock.
  • In the first pocket, I put sequins to further create a festive feel.
  • The second pocket was created by cutting a slit following the banner curve in the screen print and it holds the letters.

You'll need these supplies:

Directions:
  1. On the Banners overlay, follow one of the banner rows with a craft knife and then punch small holes at the start and end of the slit
  2. Then align the overlay over the cardstock, sew a pocket to fit your own letters, more photos, or any other keepsakes
  3. Then simply sew 3 of the 4 edges together, sprinkle some sequins in, and finish sewing the 4th edge.
  4. Above the pocket, I added a small stack of mixed overlays and white tissue paper, and topped it off with a photo of us.

These are some of my favorite techniques and one of my favorite traditions, so I hope you'll give them a try!

Don't forget to check out the Hambly blog for more inspiration!

Thanks for stopping by!
- KRAFTY pearl